Shake and Bake Chicken – Crispy, Juicy & Ready in 30 Minutes
If you have been searching for a shake and bake chicken recipe that actually delivers a genuinely crispy, golden crust without frying — this is it. No greasy stovetop, no complicated breading station, and no dry, rubbery chicken underneath. Just incredibly crunchy panko-crusted chicken with a creamy ranch coating that locks in moisture and flavor all the way through.
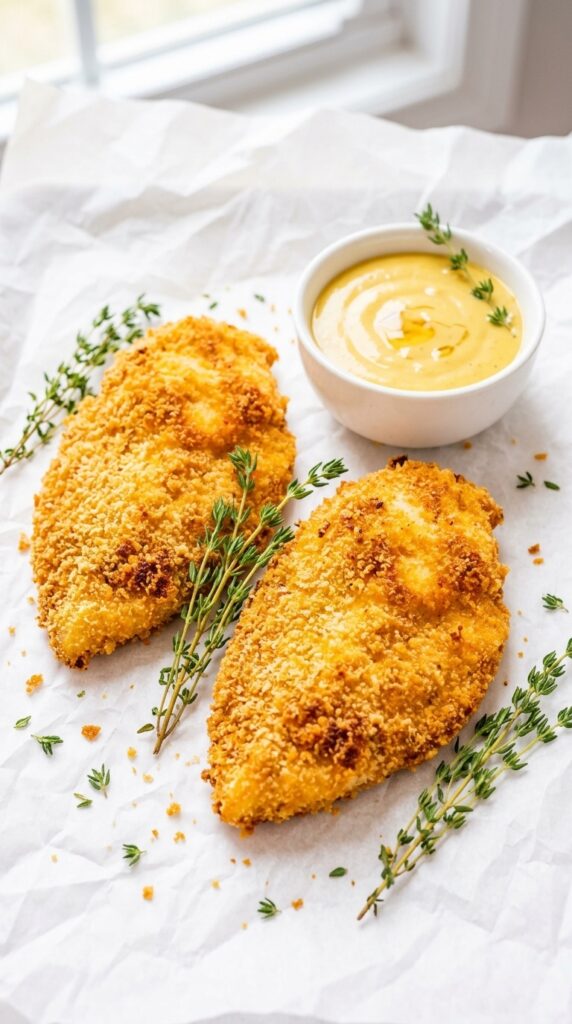
Most homemade shake and bake chicken recipes produce a pale, soft coating that falls off the moment you cut into the chicken. The difference here is the ranch coating underneath — Greek yogurt and mayonnaise create a sticky, tangy base that grips the breadcrumb mixture and keeps the crust firmly attached through the entire bake. Every bite delivers crunch and juicy chicken together.
This shake and bake chicken recipe is built for real weeknight cooking. One bowl for the coating, one bowl for the crumb mix, and 25 minutes in the oven. Faster than driving to a restaurant and infinitely better than anything from a box.
Why This Shake and Bake Chicken Recipe Works
The wire rack is the first key. Elevating the chicken above the baking sheet allows hot oven air to circulate completely around every piece, which means the bottom of the chicken crisps up just as much as the top. Baking directly on a sheet pan traps steam underneath and produces a soggy bottom crust — the wire rack eliminates that problem entirely.
The ranch coating is the second key. Plain Greek yogurt brings tanginess and acts as a tenderizing layer while the mayonnaise adds fat that conducts heat and helps the crust brown evenly. Together they create the perfect adhesive for the shake and bake mix so nothing slides off during baking.
The olive oil tossed into the panko mix is the third key. Dry breadcrumbs baked in the oven stay pale and powdery. Breadcrumbs coated in olive oil toast to a deep, even golden brown that looks and tastes like fried chicken without a single drop of oil in a pan.
Shake and Bake Chicken Ingredients
For the Chicken:
- 1.25 pounds boneless skinless chicken breasts, pounded to even thickness — Pounding is not optional. Uneven chicken breasts have a thick end that stays raw while the thin end overcooks and dries out. Pounding to an even thickness guarantees every part of the chicken is perfectly cooked at the same time. Learn more about chicken breast on Wikipedia.
- Kosher salt and pepper to taste — Season the chicken directly before applying the ranch coating to build a flavor base that the coating alone cannot provide.
- Cooking oil spray, optional — A light spray over the coated chicken before baking accelerates browning and deepens the color of the crust.
For the Homemade Ranch Coating:
- ½ cup plain Greek yogurt — The tangy base that tenderizes the chicken and holds the breadcrumb crust firmly in place.
- 2 tablespoons mayonnaise — Adds fat and richness that helps the crust brown evenly and keeps the chicken moist underneath.
- 1 tablespoon fresh lemon juice — Brightens the coating and adds a subtle acidity that cuts through the richness of the mayo and yogurt.
- 1 teaspoon garlic powder — Builds savory depth into the coating layer.
- 1 teaspoon onion powder — Works with the garlic powder for a rounded, savory base flavor.
- 1 teaspoon dried dill — The classic ranch herb that makes this coating instantly recognizable.
- ½ teaspoon dried parsley — Adds color and a mild fresh herbal note.
For the Shake and Bake Mix:
- 1¼ cups panko breadcrumbs — Panko produces a dramatically crunchier crust than regular breadcrumbs because of its larger, flakier structure. Learn more about panko on Wikipedia.
- ¼ cup finely grated Parmesan cheese — Melts into the panko during baking and adds a nutty, salty, savory layer that takes the crust far beyond plain breadcrumbs.
- 1½ tablespoons of your favorite seasoning mix — Taco, Italian, jerk, or all-purpose all work beautifully. This is where you customize the flavor profile completely.
- 2 tablespoons olive oil — Drizzled over the panko mix and tossed through with fingers. This turns pale dry breadcrumbs into a deeply golden, crispy crust.
Required Equipment
- Rimmed baking sheet
- Wire rack
- Meat mallet or rolling pin
- Two shallow bowls
- Instant-read thermometer
- Cooking oil spray
Step-by-Step Instructions
- Preheat the oven to 400°F (200°C). Place a wire rack on a rimmed baking sheet and lightly spray with cooking oil spray.
- Pound the chicken. Place each breast inside a zip-lock bag and pound with a meat mallet until even throughout — approximately ¾ inch thick.
- Season the chicken. Pat dry with paper towels and season both sides generously with kosher salt and pepper.
- Make the ranch coating. Combine the Greek yogurt, mayonnaise, lemon juice, garlic powder, onion powder, dried dill, and dried parsley in a bowl. Mix until completely smooth. Taste and adjust salt and lemon if needed.
- Make the shake and bake mix. Combine the panko, Parmesan, and seasoning mix in a shallow bowl. Drizzle olive oil over the top and toss with fingers until every crumb is coated and the mixture resembles wet sand.
- Coat the chicken. Working one piece at a time, coat each chicken breast in the ranch mixture on all sides. Press firmly into the panko mix, turning and pressing until fully and evenly coated.
- Place on the wire rack. Arrange coated chicken pieces on the rack without touching. Spray lightly with cooking oil spray for extra browning.
- Bake for 20 to 25 minutes. Do not flip. The crust is done when it is deep golden brown and the internal temperature reads 165°F.
- Rest for 5 minutes before slicing and serving.
Pro Tips for the Crispiest Shake and Bake Chicken
Pound the Chicken Before You Do Anything Else
Even thickness is the foundation of perfectly cooked shake and bake chicken. A chicken breast that is thick at one end and thin at the other cannot cook evenly. Two minutes with a meat mallet solves this completely.
Olive Oil in the Panko Is the Secret to Real Crunch
Dry panko baked in a hot oven produces a pale, chalky crust that lacks color and flavor. Panko tossed with olive oil toasts to a deep, even golden brown that looks like fried chicken. Do not skip or reduce the olive oil in the shake and bake mix.
Pack the Coating On Firmly
Press the ranch-coated chicken into the panko mix firmly with your fingers. A light dip leaves thin patches. A firm press builds a thick, even crust that stays attached through the entire bake.
Never Flip Mid-Bake
Flipping shake and bake chicken on a wire rack mid-bake pulls the crust away from the coating underneath. Leave it completely undisturbed for the full cook time. The wire rack handles the bottom crust for you.
Pull It at Exactly 165°F
An instant-read thermometer is the only reliable way to know when shake and bake chicken is done. Pull it at exactly 165°F for perfectly juicy chicken with no risk of undercooking.
Common Mistakes to Avoid
Skipping the Wire Rack
Baking shake and bake chicken directly on a sheet pan traps moisture underneath and turns the bottom coating completely soggy. The wire rack is not a suggestion — it is the difference between crispy all around and a wet, stuck-on mess.
Not Drying the Chicken First
Surface moisture on the chicken dilutes the ranch coating and prevents it from adhering properly. Always pat completely dry with paper towels before applying anything.
Using Regular Breadcrumbs Instead of Panko
Regular breadcrumbs produce a denser, softer crust that does not achieve the same crunch level as panko. Panko breadcrumbs are larger and flakier which is exactly why they produce a dramatically crispier shake and bake chicken crust.
Skipping the Rest Time
Cutting into shake and bake chicken immediately after it comes out of the oven releases all the internal juices. A 5-minute rest allows the juices to redistribute so every slice stays moist and flavorful.
Variations and Substitutions
Different Seasoning Mixes
- Italian seasoning — classic, herby, pairs beautifully with marinara dipping sauce
- Taco seasoning — smoky, slightly spicy, excellent with avocado and lime
- Jerk seasoning — bold, aromatic, Caribbean-inspired shake and bake chicken
- Cajun seasoning — spicy and deeply flavored, pairs well with a honey drizzle
- All-purpose seasoning — crowd-pleasing, works for any occasion
Chicken Thighs Instead of Breasts
Boneless skinless chicken thighs work perfectly in this shake and bake chicken recipe. They are more forgiving and deliver a richer, juicier result. Reduce bake time by 3 to 5 minutes and check for 165°F internal temperature.
Dairy-Free Version
Replace Greek yogurt with plain unsweetened dairy-free yogurt and use vegan mayonnaise. The coating behaves identically.
Gluten-Free Version
Replace the panko with gluten-free panko breadcrumbs. Everything else in this shake and bake chicken recipe is naturally gluten-free.
Air Fryer Version
Air fry at 375°F for 18 to 20 minutes depending on thickness, flipping once halfway through. The air fryer produces an extremely crispy crust and is an excellent alternative to the oven.
Storage and Reheating
Refrigerator: Store leftover shake and bake chicken in an airtight container for up to 3 days.
Reheating: Reheat in a 375°F oven for 10 minutes to restore the crunch. Microwave reheating will soften the crust significantly — the oven is always the better choice.
Freezer: Freeze fully baked and cooled pieces in a single layer then transfer to a freezer bag. Reheat from frozen in a 375°F oven for 18 to 20 minutes until heated through and crispy.
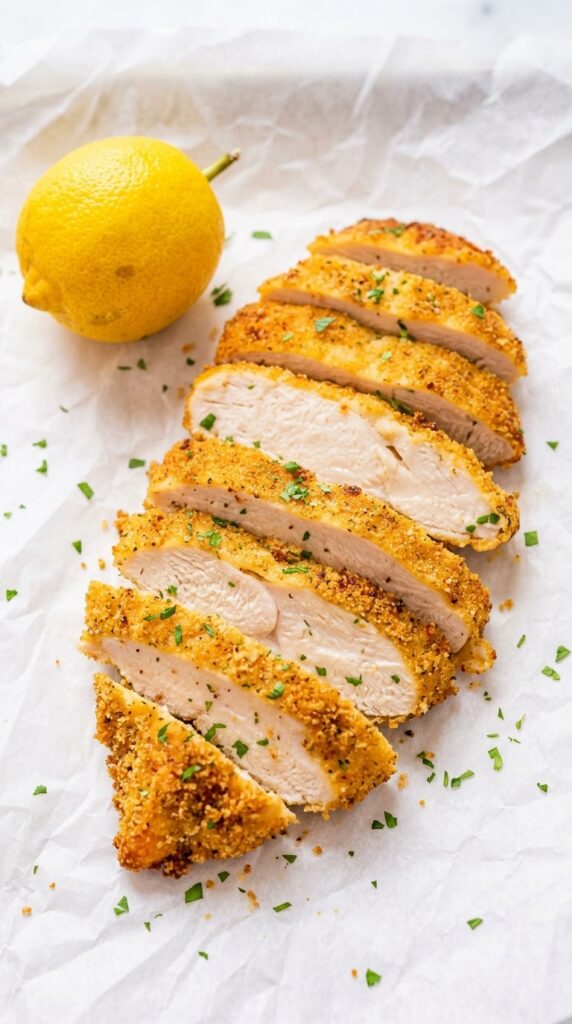
Serving Suggestions
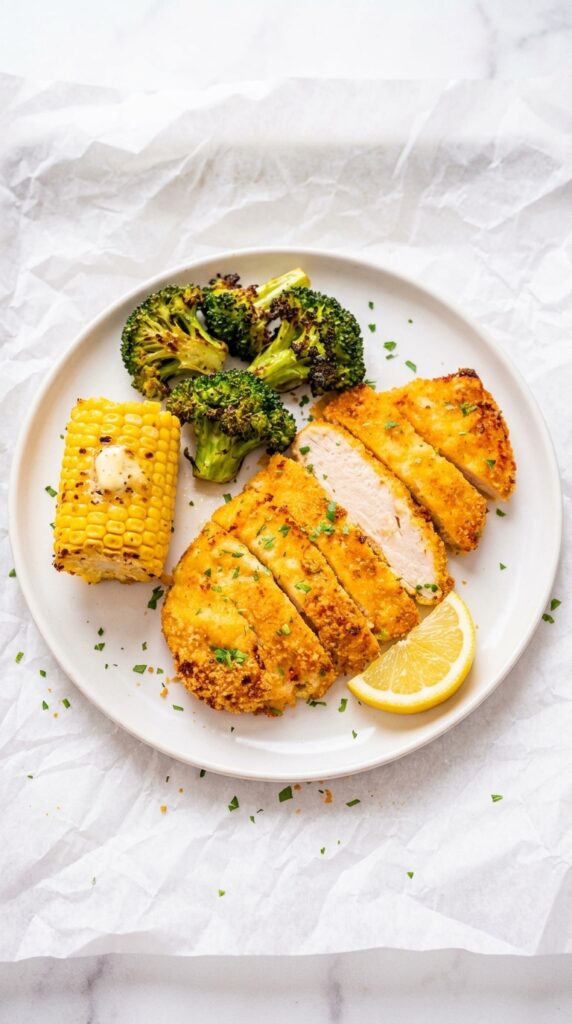
- Roasted vegetables and mashed potatoes for a complete comfort food dinner
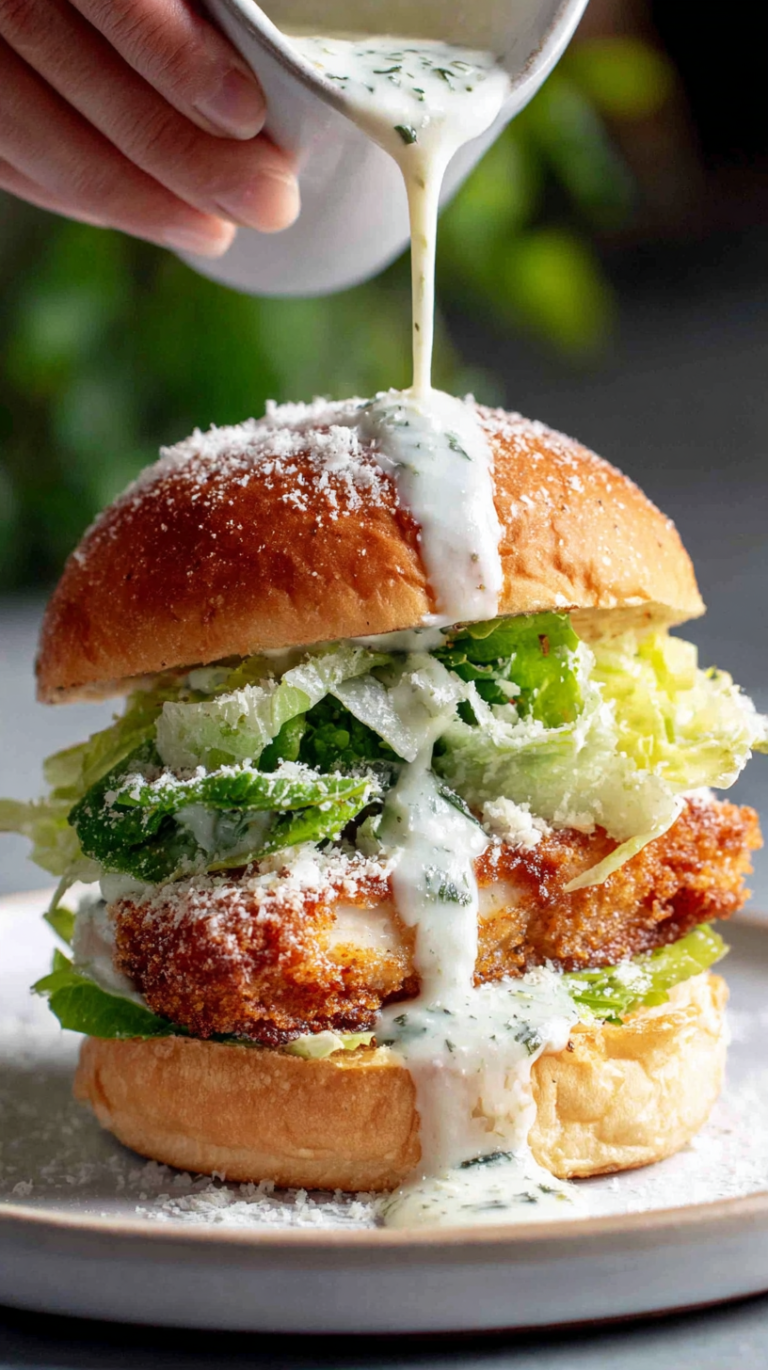
- Sliced over a Caesar salad for a crispy chicken salad
- Honey mustard, ranch dressing, or garlic aioli for dipping
- Sliced thin in sandwiches or wraps with lettuce, tomato, and avocado
- Served with pasta and marinara for an easy chicken Parmesan-style dinner
Nutrition Estimate Per Serving
Based on 4 servings:
- Calories: 380 kcal
- Protein: 38g
- Total Fat: 16g
- Saturated Fat: 4g
- Carbohydrates: 22g
- Fiber: 1g
- Sugar: 2g
- Sodium: 520mg
- Cholesterol: 95mg
Frequently Asked Questions
— Can I use chicken thighs instead of breasts?
Yes. Boneless skinless chicken thighs work excellently in this shake and bake chicken recipe. They are juicier and more forgiving than breasts. Reduce the bake time slightly and always check for 165°F internal temperature.
— Do I need a wire rack?
Yes. The wire rack is essential for crispy shake and bake chicken on all sides. Without it the bottom goes soft. If you do not have one, place the chicken on a lightly oiled baking sheet and flip once halfway through baking.
— Can I make shake and bake chicken ahead of time?
You can coat the chicken up to 4 hours ahead and refrigerate on the wire rack uncovered. The uncovered refrigeration dries out the surface of the coating slightly which produces an even crispier crust when baked.
— Why is my shake and bake chicken not crispy?
The most common causes are skipping the wire rack, not drying the chicken before coating, using regular breadcrumbs instead of panko, or not adding olive oil to the panko mix. All four steps are essential for genuinely crispy shake and bake chicken.
— Can I air fry this shake and bake chicken?
Yes. Air fry at 375°F for 18 to 20 minutes depending on thickness, flipping once halfway through. The air fryer produces an extremely crispy crust and is an excellent alternative to the oven.
— How do I know when the chicken is done?
Use an instant-read thermometer inserted into the thickest part of the chicken breast. The shake and bake chicken is done at exactly 165°F.
— Can I use bone-in chicken for this recipe?
Yes but the bake time increases to 35 to 45 minutes depending on size. Always verify with a thermometer at 165°F internal temperature.
— What seasoning mix works best?
All of them work well depending on the flavor profile you want. Italian is the most universally crowd-pleasing. Taco seasoning produces the most interesting, complex flavor. Jerk seasoning makes the boldest, most memorable shake and bake chicken.
Conclusion
This shake and bake chicken recipe delivers everything you want from a weeknight dinner — genuinely crispy crust, juicy chicken, bold flavor, and minimal cleanup. The ranch coating is the upgrade the classic box version never had. The wire rack is the technique that makes the bottom as crispy as the top. Make it once and you will never reach for the box again. For more easy weeknight dinner recipes explore the full collection at RecipesByElowen.
Print
Shake and Bake Chicken – Crispy, Juicy & Ready in 30 Minutes
- Prep Time: 10 minutes
- Cook Time: 25 minutes
- Total Time: 35 minutes
- Yield: 4 servings
- Category: Main Course
- Method: Baking
- Cuisine: American
Description
Crispy, juicy homemade shake and bake chicken with a creamy ranch coating and golden panko crust. Ready in 30 minutes, baked not fried, and infinitely better than anything from a box. The best weeknight chicken dinner your family will ask for on repeat.
Ingredients
For the Chicken:
1.25 pounds boneless skinless chicken breasts, pounded to even thickness
Kosher salt and pepper, to taste
Cooking oil spray, optional
For the Ranch Coating:
½ cup plain Greek yogurt
2 tablespoons mayonnaise
1 tablespoon fresh lemon juice
1 teaspoon garlic powder
1 teaspoon onion powder
1 teaspoon dried dill
½ teaspoon dried parsley
For the Shake and Bake Mix:
1¼ cups panko breadcrumbs
¼ cup finely grated Parmesan cheese
1½ tablespoons seasoning mix (taco, Italian, jerk, or all-purpose)
2 tablespoons olive oil
Instructions
1. Preheat oven to 400°F (200°C). Place a wire rack on a rimmed baking sheet and lightly spray with cooking oil spray.
2. Pat the chicken breasts dry with paper towels. Season both sides with kosher salt and pepper. Pound to an even thickness of approximately ¾ inch.
3. In a small bowl mix together the Greek yogurt, mayonnaise, fresh lemon juice, garlic powder, onion powder, dried dill, and dried parsley until completely smooth. Taste and adjust salt and lemon if needed.
4. In a shallow bowl combine the panko breadcrumbs, Parmesan cheese, and seasoning mix. Drizzle olive oil over the top and toss with fingers until every crumb is coated and the mixture resembles wet sand.
5. Working one piece at a time, coat each chicken breast generously in the ranch coating on both sides. Press firmly into the panko mix turning and pressing to coat all sides completely.
6. Arrange coated chicken on the wire rack without pieces touching. Spray lightly with cooking oil spray for extra browning.
7. Bake for 20 to 25 minutes without flipping until the crust is deep golden brown and the internal temperature reaches 165°F.
8. Rest for 5 minutes before slicing and serving.
Notes
Wire rack is non-negotiable — allows hot air to circulate underneath so the bottom crust crisps up instead of going soggy. Never skip it.
Pat the chicken completely dry before coating — surface moisture dilutes the ranch coating and prevents proper adhesion.
Pack the panko on firmly — press with your fingers to build a thick even crust. A light dip leaves thin patches that fall off during baking.
Never flip mid-bake — flipping dislodges the crust. Leave completely undisturbed on the wire rack for the full bake time.
Pull at exactly 165°F — use an instant-read thermometer. Anything higher and the breast meat dries out regardless of the coating.
Seasoning options — Italian for classic herby flavor, taco for smoky-spicy, jerk for bold Caribbean, Cajun for spicy with a honey drizzle.
Make ahead — coat the chicken up to 4 hours ahead and refrigerate uncovered on the wire rack. The uncovered rest dries the coating slightly and produces an even crispier crust when baked.
Storage — refrigerate in an airtight container for up to 3 days. Reheat in a 375°F oven for 10 minutes to restore the crunch. Do not microwave.
Freeze — freeze fully baked cooled pieces in a single layer then transfer to a freezer bag. Reheat from frozen at 375°F for 18 to 20 minutes.