Cheesy Garlic Chicken Wraps That Solve the Weeknight Dinner Problem
Cheesy garlic chicken wraps are one of the most practical weeknight dinners in a home cook’s rotation. They come together in under 25 minutes, require one skillet, use ingredients most households already have, and produce a result that satisfies without compromise. The problem is that most versions miss on at least one of the three things that make this dish work: the garlic flavor is too faint, the cheese does not melt properly into the filling, or the tortilla ends up soggy and cold by the time it reaches the table.
For more easy and delicious chicken recipes, explore our collection.
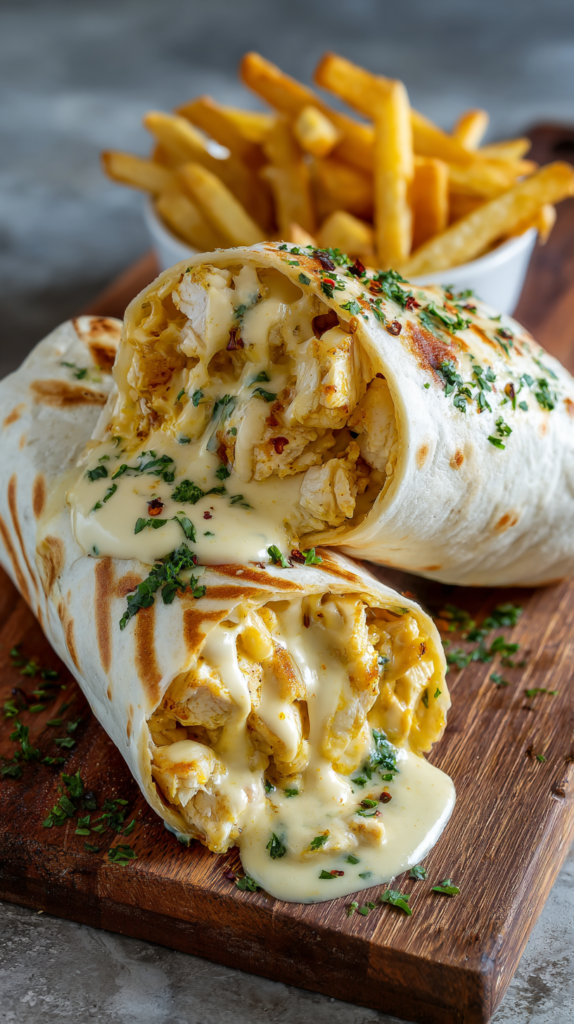
This cheesy garlic chicken wrap recipe solves all three problems with specific technique choices. The garlic is bloomed in butter or olive oil before the chicken goes in, which concentrates and deepens its flavor. The shredded mozzarella or cheddar is stirred into the hot filling off the heat so it begins melting into the chicken without overcooking or clumping. The assembled wraps are pressed in a hot, dry skillet or griddle until the exterior is golden brown and the cheese finishes melting under the heat of the tortilla itself.
The result is a cheesy garlic chicken wrap with a golden, slightly crisped exterior, a filling that is creamy with melted cheese and aromatic with garlic, paprika, and fresh parsley, and a tortilla that is warm and pliable all the way through rather than cold on the outside and hot only in the center.
Whether you are making these for a quick family dinner on a Tuesday, packing them for lunches, meal prepping a batch for the week, or putting together a casual spread for guests, cheesy garlic chicken wraps deliver an excellent result with minimal effort and total flexibility on ingredients. Rotisserie chicken makes the prep faster. Leftover chicken from the previous night makes it faster still. The garlic butter base works with virtually any protein substitution. Once you make this recipe once, you will adjust it to your household and repeat it indefinitely.
Follow the steps exactly the first time, particularly the garlic-blooming step and the griddle-press finish. Both are the difference between a cheesy garlic chicken wrap that is ordinary and one that people ask for again.
Why This Cheesy Garlic Chicken Wrap Recipe Works
Cheesy garlic chicken wraps fail most often at three points: under-developed garlic flavor, cheese that does not fully melt, and a tortilla that is cold and soft rather than warm and toasty. This recipe addresses all three.
Blooming the Garlic in Fat First
Adding minced garlic directly to a cold pan and then heating it produces a different flavor result than adding garlic to already-hot fat. When garlic hits hot olive oil or butter, the fat-soluble aromatic compounds in the garlic immediately begin volatilizing and blooming — the kitchen fills with the sharp, pungent, deeply savory smell that defines garlic-forward cooking. The fat acts as a flavor-extraction medium, pulling the garlic’s most complex compounds into suspension in the oil, which then coats every piece of chicken evenly as it is added.
Cheesy garlic chicken wraps made by adding garlic at the same time as the chicken taste of garlic on the surface of the meat. Wraps made by blooming the garlic first in hot fat taste of garlic throughout every bite.
Cheese Stirred in Off the Heat
Adding shredded mozzarella or cheddar to the filling while the pan is still on active heat is the primary cause of clumpy, greasy, or stringy cheese in cheesy garlic chicken wraps. High heat causes the proteins in shredded cheese to tighten and seize before the fat can emulsify properly, producing clumps that sit in the filling rather than integrating with it. Removing the pan from heat and then stirring in the shredded cheese uses the residual heat in the filling — which is sufficient to begin melting the cheese smoothly — without the excess temperature that causes clumping.
The Griddle Press for the Outside
Assembling a cheesy garlic chicken wrap and eating it immediately without pressing it in a hot pan produces a tortilla that is soft, slightly cold, and lacks any textural contrast with the warm filling inside. Pressing the assembled wrap seam-side down in a hot, dry skillet for 2 to 3 minutes per side produces a golden-brown, slightly crispy exterior that creates a textural contrast with the melted, creamy filling inside. The heat from the pan surface also finishes melting any remaining cheese in the filling and warms the tortilla from the outside in so the wrap is uniformly hot throughout.
Garlic Powder in Addition to Fresh Garlic
The seasoning in this cheesy garlic chicken wrap recipe uses both fresh minced garlic (bloomed in fat) and garlic powder added directly to the chicken with the other spices. Fresh garlic provides the sharp, complex, aromatic garlic flavor that comes from the volatile compounds in raw garlic. Garlic powder provides a different, more mellow, baked garlic character that complements rather than duplicates the fresh garlic. Using both produces a layered garlic presence that is more interesting and complete than either alone.
Mozzarella or Cheddar: Both for Different Results
Shredded mozzarella produces a cheesy garlic chicken wrap with long, creamy, pull-apart cheese threads — mild, milky, and smooth. Shredded cheddar produces a sharper, more assertive cheese flavor with a slightly less stretchy melt. A combination of both — 3/4 cup mozzarella and 3/4 cup cheddar — produces the best of both: the stretch and creaminess of mozzarella with the flavor punch of cheddar. Either individual choice works; the combination is the professional approach.
Ingredients for Cheesy Garlic Chicken Wraps
This recipe makes 4 cheesy garlic chicken wraps, one per person as a main course. Scale proportionally for larger batches — the recipe doubles cleanly.
The Filling
- 2 cups cooked chicken, shredded or diced into small pieces (approximately 1 lb boneless chicken, or 1/2 of a rotisserie chicken)
- 2 tablespoons olive oil or unsalted butter
- 3 cloves garlic, freshly minced (approximately 1 tablespoon)
- 1 teaspoon fine salt
- 1/2 teaspoon ground black pepper
- 1/2 teaspoon paprika
- 1/2 teaspoon garlic powder
- 1 1/2 cups shredded mozzarella, cheddar, or a combination of both — freshly shredded from a block
- 1 tablespoon fresh flat-leaf parsley, finely chopped (optional but recommended)
The Wraps
- 4 large flour tortillas, burrito-size (10 to 12-inch diameter)
Key Ingredient Notes
Cooked Chicken: Any pre-cooked chicken works for cheesy garlic chicken wraps. Rotisserie chicken is the most convenient and contributes a roasted, slightly smoky flavor that adds depth to the filling beyond what plain poached chicken provides. Leftover baked or grilled chicken works equally well. If cooking chicken specifically for this recipe, poaching in lightly salted water for 15 to 18 minutes or baking at 400 F for 20 to 22 minutes produces the cleanest, most versatile result. Cut or shred the chicken into pieces no larger than 1/2 inch — smaller pieces distribute more evenly through the filling and produce a more cohesive, easier-to-eat cheesy garlic chicken wrap.
For more easy and delicious chicken recipes, explore our collection.
Olive Oil vs Butter: Both work as the fat base for the garlic bloom in cheesy garlic chicken wraps. Olive oil produces a slightly lighter, more Mediterranean character. Butter produces a richer, more indulgent flavor base that pairs particularly well with the garlic and cheese. A combination of 1 tablespoon of each — butter for flavor, olive oil for its higher smoke point — is the professional approach when you want the richness of butter without the risk of burning during the garlic bloom step.
Fresh Garlic: Three cloves of freshly minced garlic produces the right garlic intensity for cheesy garlic chicken wraps when combined with the additional 1/2 teaspoon of garlic powder in the seasoning. Do not substitute garlic from a pre-minced jar if you can avoid it — jarred minced garlic has been processed and stored in citric acid, which dulls the fresh, volatile compounds responsible for the sharp, bloomed-garlic flavor this dish depends on. Fresh cloves minced just before cooking produce a dramatically more present garlic aroma and flavor.
Shredded Cheese: Fresh-shredded mozzarella or cheddar from a block is the correct choice for cheesy garlic chicken wraps. Pre-shredded bagged cheese contains cellulose anti-caking coating that prevents smooth melting and produces a filling with a slightly gritty, uneven texture. Whole-milk mozzarella produces the longest, stretchiest pull. Sharp cheddar produces the most assertive flavor. Using 3/4 cup of each creates the ideal balance for a cheesy garlic chicken wrap that has both visual stretchy-cheese appeal and strong cheese flavor.
Paprika: Smoked paprika adds a subtle wood-smoke depth to the chicken seasoning in cheesy garlic chicken wraps that standard paprika does not. It is one of the inexpensive spice upgrades that produces a noticeably more complex finished flavor without requiring any additional technique. Either sweet or smoked paprika is appropriate — smoked for more depth, sweet for a milder, cleaner flavor profile.
Large Flour Tortillas: Use burrito-size flour tortillas, 10 to 12 inches in diameter, for cheesy garlic chicken wraps. Smaller tortillas do not have enough surface area to contain 1/2 cup of filling per wrap while leaving the edges free for folding. Tortillas that are too small produce wraps that cannot be fully sealed, which causes filling to escape during the griddle-press step. Warm the tortillas briefly before filling — 20 seconds in a dry skillet or 30 seconds in the microwave under a damp paper towel — to improve pliability and prevent cracking at the fold.
Fresh Parsley: One tablespoon of freshly chopped flat-leaf parsley added to the filling just before wrapping provides a bright, clean herbal note that cuts through the richness of the garlic butter and melted cheese. It is listed as optional but recommended — the color contrast it provides in the filling and the flavor brightness it adds to each bite make the finished cheesy garlic chicken wrap more interesting than one without it. Dried parsley is a functional substitute but contributes far less flavor and no visual freshness.
Required Equipment
Cheesy garlic chicken wraps require only two pieces of cookware. Nothing specialized.
- 12-inch skillet or saute pan — for blooming the garlic, cooking the seasoned chicken filling, and pressing the assembled wraps. A cast iron skillet or a non-stick skillet both work. Cast iron retains heat more evenly during the wrap-pressing step, which produces more uniform exterior browning. Non-stick is easier to clean and prevents any sticking during the garlic-blooming stage.
- Flat griddle or second skillet — useful if you want to press multiple cheesy garlic chicken wraps simultaneously rather than one at a time. A large flat griddle can accommodate 2 to 3 wraps at once, which is practical when cooking for a family.
- Silicone spatula — for stirring the shredded cheese into the hot filling off the heat; a silicone spatula folds the cheese in gently without breaking down the chicken pieces
- Wide, flat spatula — for flipping the wraps during the griddle-press step without them opening
- Sharp knife and cutting board — for mincing the fresh garlic and chopping the parsley
- Grater or box grater — for freshly shredding the mozzarella or cheddar from the block
Step-by-Step Instructions: How to Make Cheesy Garlic Chicken Wraps
Step 1: Prepare the Ingredients
- If using a rotisserie chicken, pull the breast and thigh meat from the bones while the chicken is still warm. Shred or dice the meat into small pieces no larger than 1/2 inch and set aside.
- Mince the fresh garlic cloves finely. The garlic pieces should be small and uniform so they cook evenly during the blooming step without any large pieces burning before smaller ones have cooked through.
- Shred the mozzarella and or cheddar from the block directly onto a plate or into a bowl. Set aside.
- Chop the fresh parsley finely if using. Set aside.
Chef’s Note: Having all ingredients prepared and within reach before turning on the stove is the single most important setup step for cheesy garlic chicken wraps. The garlic-blooming phase takes only 60 to 90 seconds and requires your full attention — if you are still mincing garlic while the fat is in the pan, the garlic will burn before you have a chance to add the chicken.
Step 2: Bloom the Garlic
- Place the skillet over medium heat. Add the 2 tablespoons of olive oil or butter. Heat until the oil shimmers and moves freely when the pan is tilted, or until the butter has fully melted and the foam subsides — approximately 60 to 90 seconds.
- Add the minced garlic to the hot fat. Stir immediately and continuously with the silicone spatula. The garlic will begin sizzling actively and the kitchen will smell intensely of garlic within 15 to 20 seconds. This is the bloom — the moment when the fat-soluble aromatic compounds in the fresh garlic are releasing into the surrounding fat.
- Cook the garlic for 60 to 90 seconds total, stirring constantly, until it is fragrant, slightly softened, and just beginning to turn pale golden at the edges. The garlic should not brown — brown garlic has begun developing bitter compounds that will negatively affect the flavor of the cheesy garlic chicken wrap filling. If the garlic is coloring too fast, reduce the heat immediately and add the chicken to stop the browning.
Chef’s Note: The visual target for correctly bloomed garlic is pale, translucent, and fragrant — not golden, not brown. The smell should be sharp and inviting, not bitter or acrid. If you smell burning, the heat is too high. The garlic-blooming step is what makes these cheesy garlic chicken wraps taste as good as they do. Rushing it or burning the garlic is the single most impactful mistake in this recipe.
Step 3: Season and Heat the Chicken
- Add the shredded or diced cooked chicken to the skillet with the bloomed garlic. Stir to coat the chicken pieces in the garlic-infused fat.
- Sprinkle the salt, black pepper, paprika, and garlic powder evenly over the chicken. Stir again until every piece of chicken is coated with the seasoning.
- Cook over medium heat, stirring occasionally, for 4 to 5 minutes until the chicken is heated through, aromatic, and beginning to look slightly glossy from the garlic fat coating. The filling should smell of garlic, paprika, and warm chicken — deeply savory and fragrant. The chicken should not be browning or crisping at this stage; you are warming and seasoning it, not searing it.
- After 4 to 5 minutes, taste a piece of chicken. It should be well-seasoned, with clear garlic and paprika notes. Adjust salt if needed.
Step 4: Add the Cheese
- Remove the skillet from the heat entirely. This is the critical step — the cheese must be added off direct heat.
- Scatter the shredded mozzarella and or cheddar over the hot chicken filling in the skillet. Using the silicone spatula, fold the cheese into the filling using a gentle, lifting motion from the bottom up. Continue folding for 60 to 90 seconds.
- The residual heat in the filling will begin melting the shredded cheese as you fold. The goal is a filling where the cheese is softened and beginning to melt into the chicken — not fully liquid, not still in cold shreds, but in a state between the two where it is warm, slightly stringy, and integrated with the garlic chicken.
- Add the chopped fresh parsley to the filling and fold in gently. The parsley should be folded in at the very end to preserve its color and fresh flavor — adding it earlier into the heat causes it to wilt and lose both visual appeal and taste.
Chef’s Note: The filling for cheesy garlic chicken wraps is ready to use when you can lift a spoonful and see the cheese beginning to pull between the chicken pieces in short, soft strands. If the cheese is still in cold, distinct shreds, let the filling rest in the hot pan for an additional 30 seconds off the heat before wrapping.
Step 5: Warm the Tortillas
- Warm the large flour tortillas before filling them. Warm tortillas are pliable, cooperative, and fold without cracking. Cold tortillas are stiff and can develop small tears at the fold points that cause filling to escape during the griddle-press step.
- Microwave method: Stack all four tortillas and wrap in a slightly damp paper towel. Microwave for 30 to 40 seconds until warm and flexible throughout.
- Skillet method: Using the same skillet you cooked the filling in (wiped clean), warm each tortilla for 20 seconds per side over medium heat until soft and pliable.
Step 6: Fill and Roll the Wraps
- Lay one warm tortilla flat on a clean work surface. Spoon approximately 1/2 cup of the cheesy garlic chicken filling into the center of the tortilla, spreading it into an even rectangular layer. Leave approximately 1.5 to 2 inches of clear tortilla on all four sides.
- Fold the left and right sides of the tortilla inward over the edges of the filling. Press gently to hold them in place.
- Starting at the edge nearest you, roll the tortilla away from you over the filling, keeping it tight as you roll. The wrap should feel firm and compact, not loose and puffy. A loose wrap will unroll during the griddle-press step.
- Place the finished cheesy garlic chicken wrap seam-side down on a plate while you roll the remaining three wraps.
Chef’s Note: The most common structural failure in cheesy garlic chicken wraps is overfilling. A wrap with too much filling cannot be rolled tightly and will burst at the seam during pressing. One-half cup of filling per large tortilla is the right amount. If the filling is overflowing before you begin rolling, remove some and set it aside for a fifth wrap or as a side dip.
Step 7: Press and Toast the Wraps
- Heat a clean skillet or flat griddle over medium heat. No oil is needed — the fat already in the filling and on the tortilla surface from the warming step is sufficient for toasting.
- Place the cheesy garlic chicken wraps seam-side down in the hot skillet. The immediate heat seals the seam, preventing the wrap from unrolling during pressing.
- Press each wrap gently with a flat spatula for the first 30 seconds to ensure full contact between the tortilla surface and the hot pan. Cook for 2 to 3 minutes until the bottom of the wrap is golden brown and lightly crispy — you will see the color change at the edges first and hear an active sizzle throughout.
- Flip the wraps using the wide spatula in a single, confident motion. Cook the second side for 2 to 3 minutes until equally golden brown. The tortilla should be uniformly golden across both sides with lightly toasted spots that smell of garlic and warm cheese.
- Remove from the heat. Allow the cheesy garlic chicken wraps to rest for 2 minutes before cutting. This rest allows the cheese inside to set slightly so it does not pour out when the wrap is sliced. The internal temperature should be above 160 F throughout.
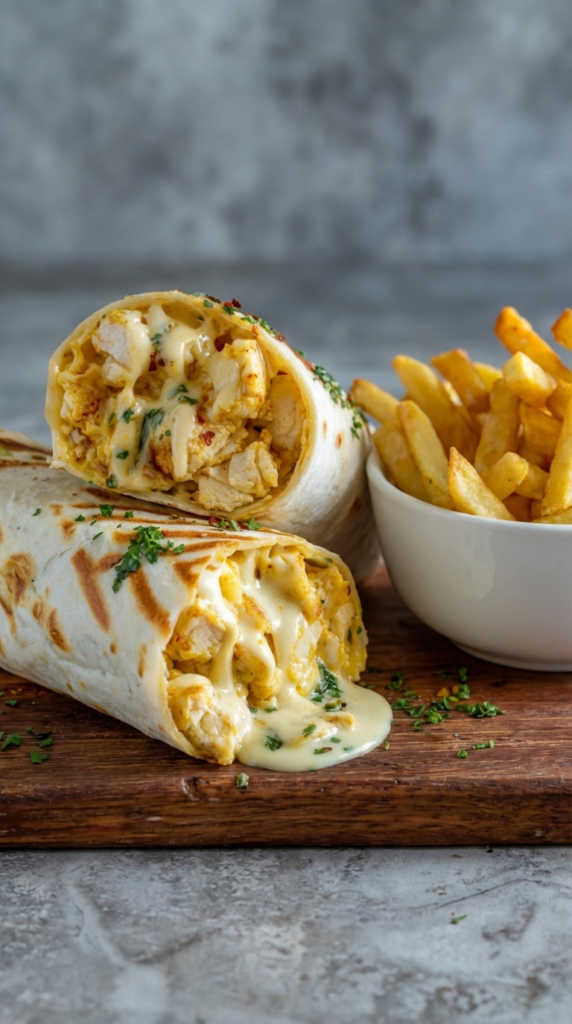
- Cut each wrap diagonally across the center with a sharp knife. The cross-section should reveal the melted, cheesy garlic chicken filling with visible cheese threads, flecks of paprika, and bright parsley throughout.
Chef Nina Cabrera Pro Tips for Perfect Cheesy Garlic Chicken Wraps
Tip 1: Do Not Rush the Garlic
The garlic-blooming step takes 60 to 90 seconds and needs your complete attention during that time. This is not a step where you can turn away to prep something else. The difference between pale gold garlic that smells inviting and dark brown garlic that smells bitter takes approximately 20 seconds at medium heat. Keep the heat at medium, stir constantly, and pull back the heat or add the chicken immediately if the garlic begins coloring faster than you expect. The entire flavor profile of the cheesy garlic chicken wrap depends on getting this step right.
Tip 2: Use Rotisserie Chicken for the Best Flavor
Pre-seasoned rotisserie chicken adds a layer of roasted, slightly caramelized flavor to the cheesy garlic chicken wrap filling that plain poached chicken does not match. When the rotisserie chicken hits the hot garlic-infused fat in the skillet, the pre-existing seasoning on the exterior of the shredded meat caramelizes slightly, deepening the overall flavor of the filling. Pull the meat while the chicken is still warm for the easiest shredding and the best flavor extraction.
Tip 3: Always Shred Cheese From a Block
Pre-shredded cheese from a bag is coated with cellulose to prevent clumping in the package. That coating prevents the cheese from melting smoothly into the garlic chicken filling and produces a slightly grainy texture in the finished cheesy garlic chicken wrap. Buying a block of whole-milk mozzarella or sharp cheddar and shredding it fresh takes 3 minutes. The difference in melt quality and flavor is significant and immediately apparent in the finished wrap.
Tip 4: Combine Mozzarella and Cheddar
Using both cheeses together produces a filling that has the stretch and creaminess of mozzarella and the sharp, salty flavor of cheddar. Neither cheese alone provides both qualities simultaneously. Use 3/4 cup of each for the 1 1/2 cup total in this recipe. The mozzarella provides the visual appeal of long cheese pulls and a smooth, creamy base. The cheddar provides the flavor that makes people identify the wrap as properly cheesy rather than just melted dairy.
Tip 5: Toast the Wraps in a Dry Pan
Adding oil to the pan for the griddle-press step produces greasy, spotted cheesy garlic chicken wraps rather than uniformly golden, lightly crispy ones. The tortilla already contains enough surface fat from the filling inside and from the warming step to toast properly in a clean, dry pan. A dry pan at medium heat produces even, controlled browning. An oiled pan at the same temperature produces patchy browning with some areas darkening before others and an overall greasier mouthfeel at the wrap edges.
Tip 6: Press Firmly for the First 30 Seconds
The first 30 seconds of the griddle-press step are when the seam of the cheesy garlic chicken wrap is being sealed by the heat of the pan. Press the wrap firmly with a flat spatula during this window to ensure the seam makes full contact with the hot surface and bonds closed. After the seam is sealed — which happens visually when the tortilla surface turns from pale to slightly translucent at the bottom — release the pressure and let the wrap toast without pressing.
Tip 7: Rest Before Cutting
A cheesy garlic chicken wrap cut immediately after coming off the griddle will release molten cheese filling from both cut ends in a stream that ends up on the cutting board rather than in the wrap. Two minutes of resting after the griddle step allows the melted cheese to cool from liquid temperature to a soft, semi-set state that holds its position when the wrap is sliced. The diagonal cut maximizes the visible cross-section of the filling, which is the most visually appealing presentation for cheesy garlic chicken wraps.
Tip 8: Season the Filling More Assertively Than Seems Right
The warm flour tortilla that encloses the cheesy garlic chicken wrap filling softens the perceived intensity of all the seasonings slightly. Filling that tastes well-seasoned in the skillet will taste mildly seasoned inside the wrap. Taste the filling before wrapping and ensure the salt, garlic, and paprika are all clearly present. If any of them feels muted, add a pinch more before wrapping. The cheese also absorbs salt as it melts, which further reduces the perceived seasoning intensity in the finished cheesy garlic chicken wrap.
Common Mistakes to Avoid When Making Cheesy Garlic Chicken Wraps
Mistake 1: Burning the Garlic
Burnt garlic produces a bitter, acrid flavor that permeates the entire filling of a cheesy garlic chicken wrap and cannot be corrected after the fact. The only remedy for burnt garlic is starting over. Keep the heat at medium, stir constantly during the blooming step, and watch for color. The garlic should be pale gold and fragrant after 60 to 90 seconds — if it is dark brown, the heat was too high or the garlic was left unattended.
Mistake 2: Adding Cheese While the Pan Is on Direct Heat
Cheese added to an actively hot pan in a skillet that has not been removed from the heat will seize. The proteins tighten at high temperature before the fat can emulsify properly, producing clumps of solidified cheese rather than smooth, melted strands that integrate with the garlic chicken filling. Always remove the pan from the heat before adding the shredded cheese to cheesy garlic chicken wraps. The residual heat in the filling is all that is needed to melt the cheese smoothly.
Mistake 3: Overfilling the Wraps
A cheesy garlic chicken wrap with more than 1/2 cup of filling cannot be rolled tightly. A loosely rolled wrap will either unroll during the griddle-press step or burst at the side seams, spilling the filling into the pan. Two tablespoons of filling can make the difference between a wrap that rolls cleanly and one that fails. Measure the filling for the first wrap and use that quantity as your reference for the remaining three.
Mistake 4: Using Cold Tortillas
A cold large flour tortilla is significantly stiffer than a warm one. Cold tortillas develop small tears and cracks at the fold points during rolling that act as weak spots where filling escapes during the press. Warming tortillas for 30 seconds in the microwave or 20 seconds per side in a dry skillet takes under 2 minutes for all four and prevents every tortilla-related structural problem in cheesy garlic chicken wraps.
Mistake 5: Cutting the Wrap Immediately After Pressing
The filling inside a cheesy garlic chicken wrap is at its most molten and fluid immediately after the griddle press. Cutting at this point releases the filling from both cut ends. A 2-minute rest on a cutting board allows the cheese to firm from molten liquid to a soft, semi-solid state that stays in the wrap when sliced. This is a short wait with a disproportionate effect on the plating result.
Mistake 6: Skipping the Griddle-Press Step
A cheesy garlic chicken wrap that is assembled and served without pressing in a hot pan has a soft, pale, slightly cold exterior that contrasts unpleasantly with the hot filling inside. The griddle press is what produces the golden, toasted exterior that makes cheesy garlic chicken wraps feel finished and restaurant-quality rather than assembled at home. The press takes 4 to 6 minutes for four wraps and cannot be skipped without a visible and textural compromise.
Mistake 7: Using Pre-Shredded Cheese
As discussed in the ingredients section, pre-shredded bagged cheese contains anti-caking coatings that prevent clean melting. The result is a cheesy garlic chicken wrap filling with a grainy, slightly separated cheese texture rather than the smooth, creamy, pull-apart cheese threads the recipe is known for. Buying blocks and shredding fresh is the single easiest quality improvement available to this recipe.
For more easy and delicious chicken recipes, explore our collection.
Variations and Substitutions for Cheesy Garlic Chicken Wraps
Spicy Cheesy Garlic Chicken Wraps
Add 1/4 to 1/2 teaspoon of cayenne pepper or red pepper flakes to the spice mix that goes into the chicken filling. For a chipotle version, substitute the standard paprika with chipotle powder and add 1 teaspoon of adobo sauce from a can of chipotles in adobo. The smoky, building heat of chipotle pairs exceptionally well with the garlic butter base and the melted mozzarella. Serve with a drizzle of hot sauce inside the wrap or on the side for guests who want additional heat.
Cheesy Garlic Chicken Caesar Wraps
Add 1/4 cup of Caesar dressing and 2 tablespoons of freshly grated Parmesan to the filling along with the shredded cheese. Use romaine lettuce — roughly chopped — placed inside the wrap along with the warm garlic chicken mixture. The Caesar dressing stays slightly cool against the warm chicken and provides the tangy, anchovy-forward flavor profile of a Caesar salad in wrap form. This variation transforms the cheesy garlic chicken wrap into something closer to a restaurant lunch item and is particularly popular for packed lunches.
Cheesy Garlic Chicken and Bacon Wraps
Cook 4 to 6 strips of bacon until crispy, drain, and crumble. Stir the crumbled bacon into the garlic chicken filling along with the shredded cheese at the end-of-heat step. The smoky, salty bacon adds both flavor and a textural crunch element to the cheesy garlic chicken wrap that cheese and chicken alone do not provide. The bacon fat also enriches the filling slightly, producing a more indulgent version of the base recipe.
Lighter Cheesy Garlic Chicken Wraps
Replace the olive oil or butter with a non-stick cooking spray to reduce added fat in the skillet phase. Use reduced-fat shredded cheese or part-skim mozzarella. Substitute one large flour tortilla with a whole wheat or spinach tortilla for added fiber. These substitutions reduce the calorie and fat content of each cheesy garlic chicken wrap by approximately 20 percent without significantly compromising the garlic or cheese flavor.
Cheesy Garlic Chicken Wraps With Vegetables
Saute 1/2 cup each of diced bell pepper and sliced mushrooms in the olive oil before adding the garlic. Cook until the vegetables are softened and any released moisture has evaporated — approximately 4 to 5 minutes. Then add the garlic and proceed with the recipe as written. The vegetables add fiber, color, and a second flavor dimension without changing the structure or technique of the cheesy garlic chicken wrap. Caramelized onion is a particularly effective addition — cook thin-sliced onion in the butter for 8 to 10 minutes until deeply golden before adding the garlic.
Cheesy Garlic Chicken Quesadilla Version
The same filling works in a quesadilla format with minimal modification. Use medium-sized flour tortillas rather than large. Place one tortilla flat in a dry skillet over medium heat. Spread approximately 1/3 cup of the cheesy garlic chicken filling over half the tortilla. Fold the empty half over the filled half. Press and cook for 2 to 3 minutes per side until golden and crispy. Cut into thirds for serving. This quesadilla version of the cheesy garlic chicken wrap is excellent for appetizer portions or as a different format for the same filling.
Dairy-Free Cheesy Garlic Chicken Wraps
Use olive oil rather than butter for the garlic bloom. Replace the shredded mozzarella and cheddar with a high-quality dairy-free shredded cheese blend — several cashew and coconut-based dairy-free cheeses now melt comparably to dairy cheese in cooked applications when used in the off-heat stirring method described in this recipe. The garlic, paprika, and seasoning profile of the cheesy garlic chicken wrap filling remains entirely intact with dairy-free substitutions.
Chicken Thigh Version for More Flavor
Boneless, skinless chicken thighs produce a richer, juicier filling for cheesy garlic chicken wraps than chicken breasts. The higher fat content of thigh meat stays moist and flavorful even after reheating, which makes the thigh version ideal for meal prep. Cook 1 lb of boneless thighs by baking at 400 F for 22 to 25 minutes or pan-searing until cooked through, then dice into 1/2-inch pieces. Use in place of the chicken breasts in the recipe with identical quantities of all other ingredients.
How to Store and Reheat Cheesy Garlic Chicken Wraps
Storing Assembled Wraps
Cool cheesy garlic chicken wraps completely before refrigerating — approximately 15 to 20 minutes. Wrap each wrap tightly in plastic wrap or aluminum foil. Refrigerate for up to 3 days. The tortilla will soften during refrigeration as moisture from the filling migrates into the bread. Reheating restores most of the original texture.
Storing the Filling Separately
For the best meal prep strategy, store the cheesy garlic chicken wrap filling separately from the tortillas. The filling keeps in an airtight container in the refrigerator for up to 4 days. When ready to eat, warm the filling in a skillet over medium-low heat for 3 to 4 minutes, stirring occasionally, until heated through and the cheese has re-melted. Fill and press the wrap fresh at serving time. This approach produces a cheesy garlic chicken wrap with fresh-made quality even on day four.
Reheating in the Skillet
The skillet is the best reheating method for cheesy garlic chicken wraps. Place the wrap in a dry skillet over medium heat. Press gently with a spatula. Heat for 2 to 3 minutes per side until the exterior is golden again and the filling is hot throughout. This method restores the crispy, toasted exterior effectively and remelts the cheese inside the wrap without making it soggy.
Reheating in the Air Fryer
The air fryer is the fastest method for reheating cheesy garlic chicken wraps while recovering the golden, crispy exterior. Set the air fryer to 350 F and heat for 4 to 5 minutes, flipping once at the halfway mark. The circulating hot air dries out any condensation that accumulated on the tortilla surface during refrigeration and restores the crunch effectively.
Reheating in the Microwave
Microwave reheating is fast but produces a soft wrap rather than a crispy one. Place the wrap on a microwave-safe plate and heat at 70 percent power in 60-second intervals until hot throughout — typically 90 seconds to 2 minutes depending on the size. If crunch is important, follow the microwave with 2 minutes in a hot dry skillet to re-toast the exterior.
Freezing
Assembled cheesy garlic chicken wraps can be frozen for up to 2 months. Wrap individually in plastic wrap, then aluminum foil. Freeze flat. Thaw overnight in the refrigerator before reheating using the skillet or air fryer method. Alternatively, reheat from frozen in a 350 F oven for 20 to 25 minutes covered with foil, removing the foil for the final 5 minutes to re-crisp the exterior.
What to Serve With Cheesy Garlic Chicken Wraps
Cheesy garlic chicken wraps are a complete meal on their own, but the right accompaniments make them feel more substantial and provide flavor contrast to the rich, garlic-forward filling.
Dips and Sauces
- Ranch dressing — the most natural dipping sauce for cheesy garlic chicken wraps; the cool, herby dressing contrasts the warm, garlic-rich filling
- Garlic aioli — doubling down on the garlic theme with a creamy, lemon-bright aioli on the side
- Marinara sauce — the tomato acidity cuts through the richness of the cheese and butter in the filling and creates an almost Italian-inspired flavor pairing
- Hot sauce — a few dashes of your preferred hot sauce inside or alongside the wrap adds heat dimension that the base recipe does not have
- Sour cream or Greek yogurt — a simple cool dip that moderates the garlic intensity for guests who find it assertive
Salads
- Caesar salad — the anchovy-forward, tangy dressing pairs directly with the garlic and Parmesan notes in the wrap filling
- Simple arugula salad with lemon and olive oil — the peppery bitterness of arugula and the brightness of lemon provide excellent contrast to the rich, cheesy filling
- Tomato and cucumber salad with fresh herbs and a light vinaigrette
- Classic coleslaw — cool, crunchy, slightly sweet coleslaw is one of the most effective contrasting sides for cheesy garlic chicken wraps
Sides
- Waffle fries or seasoned potato wedges — the most popular pairing for wraps in a casual dining format
- Tomato soup — cheesy garlic chicken wraps dipped in tomato soup is an elevated take on the grilled cheese and tomato soup combination
- Roasted broccoli with garlic and lemon — complements the garlic theme and adds a vegetable component to the meal
- Corn on the cob with herb butter
- Simple green salad with Italian vinaigrette
Meal Prep Tips
Cheesy garlic chicken wraps are one of the most practical meal prep items available. Make a double batch of the filling on Sunday and refrigerate it in a sealed container. Each morning or evening, take out 1/2 cup of filling per wrap, warm it in the skillet for 3 minutes, fill and press a fresh tortilla, and have a hot, restaurant-quality cheesy garlic chicken wrap in under 10 minutes. This approach gives you four fresh-quality lunches or dinners from one batch of prep work.
Nutrition Estimate Per Serving
Based on 4 servings of one cheesy garlic chicken wrap each, using olive oil, a combination of mozzarella and cheddar, and a standard large flour tortilla. Values are estimates and will vary based on specific ingredient brands and tortilla size.
| Nutrient | Amount Per Serving (1 cheesy garlic chicken wrap) |
| Calories | 480 kcal |
| Total Fat | 20g |
| Saturated Fat | 8g |
| Cholesterol | 90mg |
| Sodium | 710mg |
| Total Carbohydrates | 38g |
| Dietary Fiber | 2g |
| Total Sugars | 2g |
| Protein | 36g |
| Calcium | 280mg |
| Iron | 3mg |
Note: Using whole wheat tortillas adds approximately 4g of fiber per wrap and reduces the glycemic impact slightly. The lighter version with cooking spray and part-skim cheese reduces total fat to approximately 13g and calories to approximately 380 kcal per serving.
Frequently Asked Questions About Cheesy Garlic Chicken Wraps
Can I make cheesy garlic chicken wraps ahead of time?
Yes. The most practical approach is to make the filling up to 24 hours ahead and refrigerate it in an airtight container. When ready to serve, warm the filling in a skillet for 3 to 4 minutes, fill and roll the tortillas, and press in a hot dry pan. This produces cheesy garlic chicken wraps with fresh-made quality from pre-prepped filling. Fully assembled wraps can also be made ahead and refrigerated for up to 3 days — reheat in a dry skillet or air fryer to restore the exterior crunch.
What cheese works best in cheesy garlic chicken wraps?
Whole-milk mozzarella and sharp cheddar are the two best cheeses for cheesy garlic chicken wraps, and a combination of both produces the ideal result. Mozzarella provides the long, stretchy, creamy melt that makes the wrap visually compelling and texturally satisfying. Cheddar provides the sharp, salty, assertive flavor that makes the filling taste definitively cheesy. Other good options include provolone, Monterey Jack, or a Mexican blend shredded cheese. Avoid pre-shredded bagged cheese regardless of variety — the cellulose coating prevents clean melting.
How do I prevent the wrap from unrolling during pressing?
Three steps prevent a cheesy garlic chicken wrap from unrolling during the griddle-press step: do not overfill the wrap (maximum 1/2 cup of filling per large tortilla), roll it as tightly as possible during the assembly step, and place it seam-side down in the hot skillet immediately. The direct contact between the seam and the hot pan surface seals the seam within the first 30 seconds through heat and slight steam adhesion. Pressing firmly with a spatula during this first 30 seconds ensures the seam makes full contact with the pan.
Can I use raw chicken instead of pre-cooked?
This recipe is designed for pre-cooked chicken. Raw chicken pieces added to a skillet with garlic butter will require 8 to 10 minutes to cook through, during which the garlic will burn and the butter will break down. If you only have raw chicken, cook it separately first: pan-sear diced chicken in olive oil for 4 to 5 minutes per side until cooked through to 165 F, then remove and proceed with the garlic-blooming step as written before returning the cooked chicken to the pan. Alternatively, microwave the diced chicken for 3 to 4 minutes, then add to the garlic butter skillet.
What tortilla works best for cheesy garlic chicken wraps?
Large flour tortillas, 10 to 12 inches in diameter (burrito size), work best for cheesy garlic chicken wraps. They provide enough surface area to contain the filling with adequate border for sealing the wrap, they are pliable enough to roll without cracking when warm, and they toast to a golden brown during the griddle-press step. Whole wheat flour tortillas are an excellent option with added fiber and a slightly nutty flavor. Corn tortillas are too small and too brittle for this format — they are better suited to taquitos and enchiladas.
How spicy are cheesy garlic chicken wraps?
The base recipe for cheesy garlic chicken wraps has no heat beyond the slight pepper note from the black pepper and paprika. The recipe as written is mild and appropriate for all palettes. To add heat, include cayenne pepper or red pepper flakes in the seasoning, use chipotle powder in place of standard paprika, or add a drizzle of hot sauce inside the wrap before rolling. The cream cheese-like richness of the melted mozzarella moderates heat effectively, so a moderate amount of cayenne produces a mildly spicy rather than aggressively hot cheesy garlic chicken wrap.
Can I make cheesy garlic chicken wraps without a griddle?
Yes. A standard 12-inch skillet produces excellent results for the press-and-toast step of cheesy garlic chicken wraps. The key is using a pan large enough to fit the entire wrap flat without folding over the edges. If your skillet is smaller than the diameter of the assembled wrap, press the edges of the wrap slightly to reduce its diameter before placing it in the pan, or use two pans simultaneously. A cast iron skillet is the best single-pan option because its heat retention produces more even toasting across the entire surface of the wrap.
Final Thoughts on Cheesy Garlic Chicken Wraps
Cheesy garlic chicken wraps are one of the most reliably satisfying quick-dinner options in a home cook’s recipe library. Twenty-five minutes from cold ingredients to plated, golden wraps with melted cheese and fragrant garlic filling. One skillet for the filling, one pan for the press. Ingredients that are already in most kitchens.
The technique details that make the difference — blooming the garlic properly, adding the cheese off the heat, pressing the finished wrap in a dry pan, resting before cutting — are all simple and repeatable. Learn them once and they become automatic.
Use rotisserie chicken to make the recipe even faster. Shred the cheese fresh every time. Make the filling ahead when time allows. Experiment with the spicy, Caesar, and bacon variations once the base recipe is mastered.
Cheesy garlic chicken wraps are the kind of recipe that earns its place in a weekly rotation because it delivers an excellent result with proportional effort. Make them once this week and they will be in your dinner rotation for the foreseeable future.
Follow me on Pinterest for more delicious recipes.