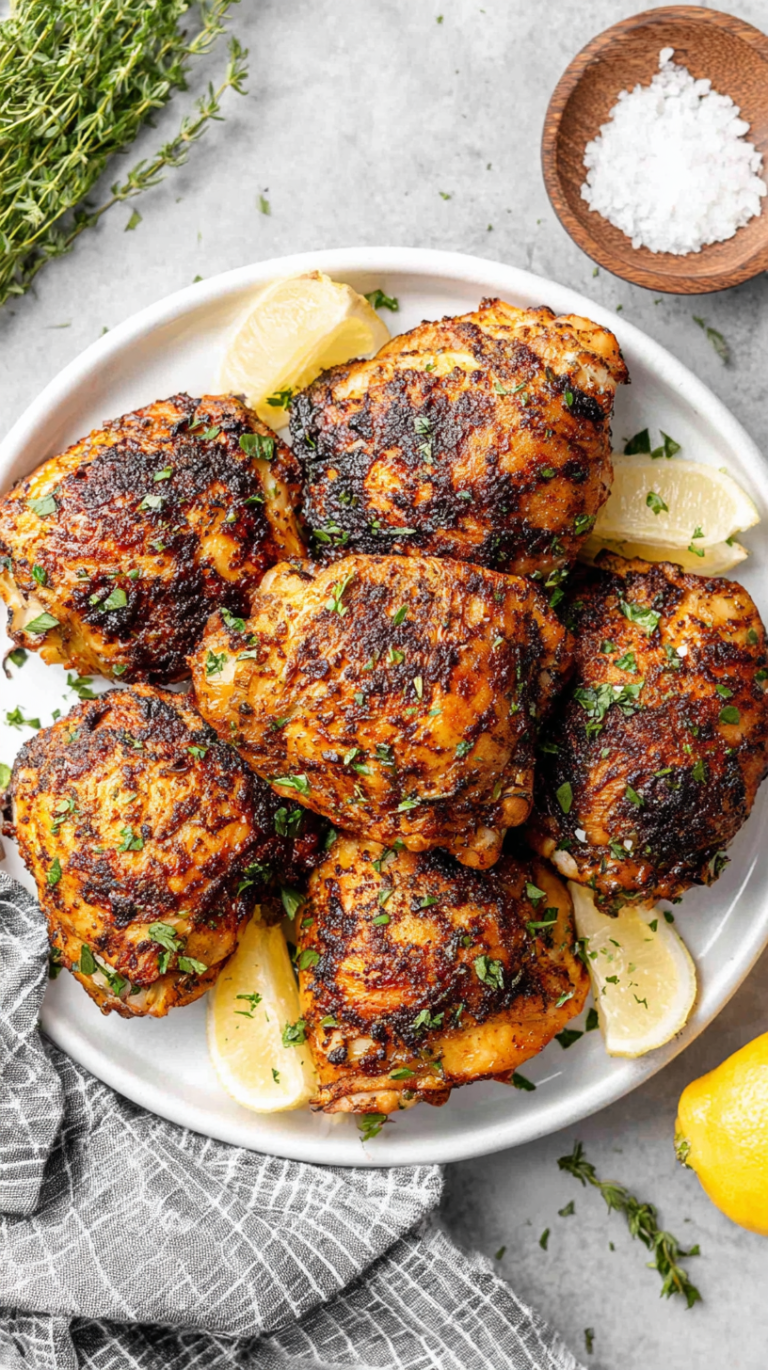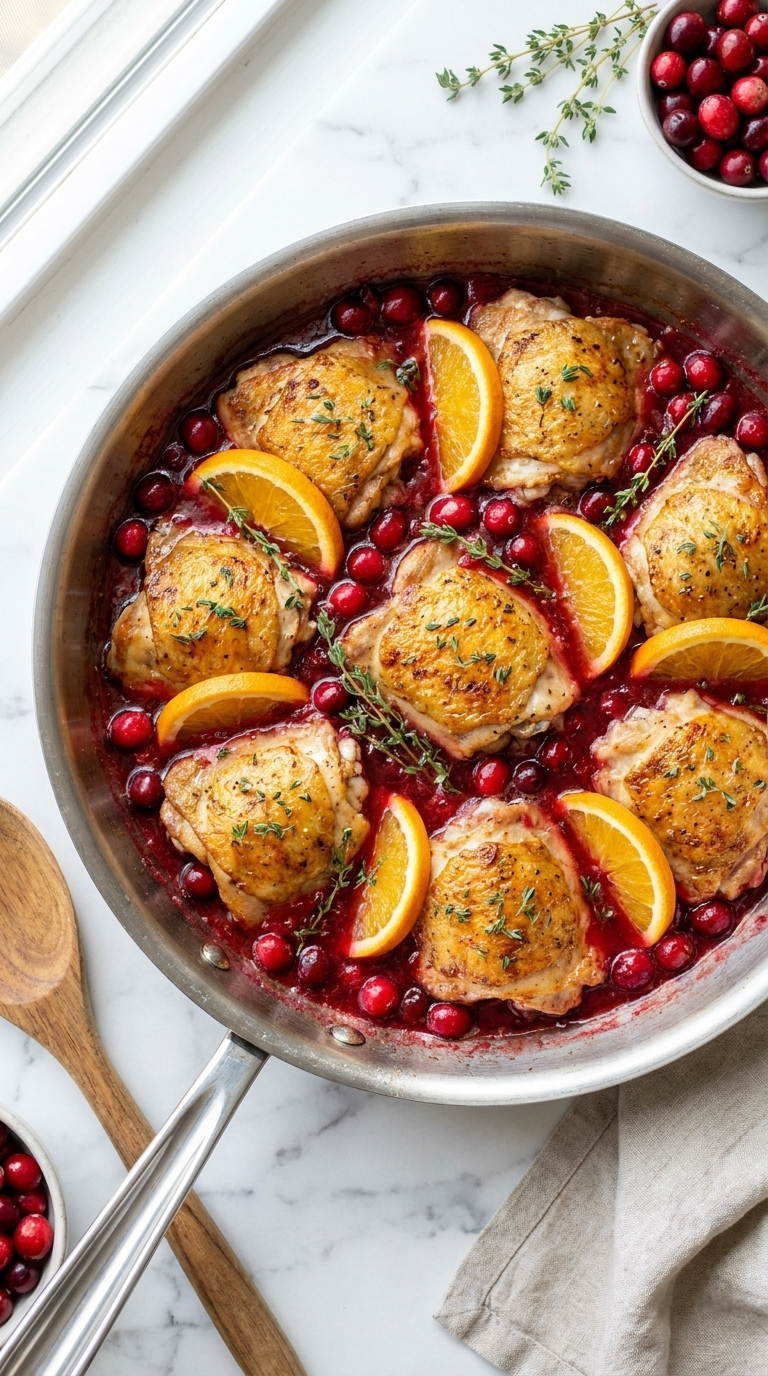
Skillet Chicken Thighs With the Crispiest Skin You Have Ever Made at Home
Skillet chicken thighs are one of the most searched weeknight dinner recipes online, and for a straightforward reason: they promise crispy skin, juicy dark meat, and full flavor from a pan that most people already own. The problem is that most home cooks never quite get the skin right. It is either pale and rubbery, burned on the outside while the center is still raw, or it lifts off the meat in one pull rather than crisping onto it.
This skillet chicken thighs recipe solves every one of those problems with a method built around two techniques that professional cooks use without thinking twice: starting skin-side down in a cold or warm pan, holding temperature through the sear, and finishing in the oven. The result is bone-in, skin-on chicken thighs with skin that crackles when you cut through it, meat that is juicy from the bone to the surface, and a seasoning profile that is present throughout rather than sitting only on the exterior.
For more easy and delicious chicken recipes, explore our collection.
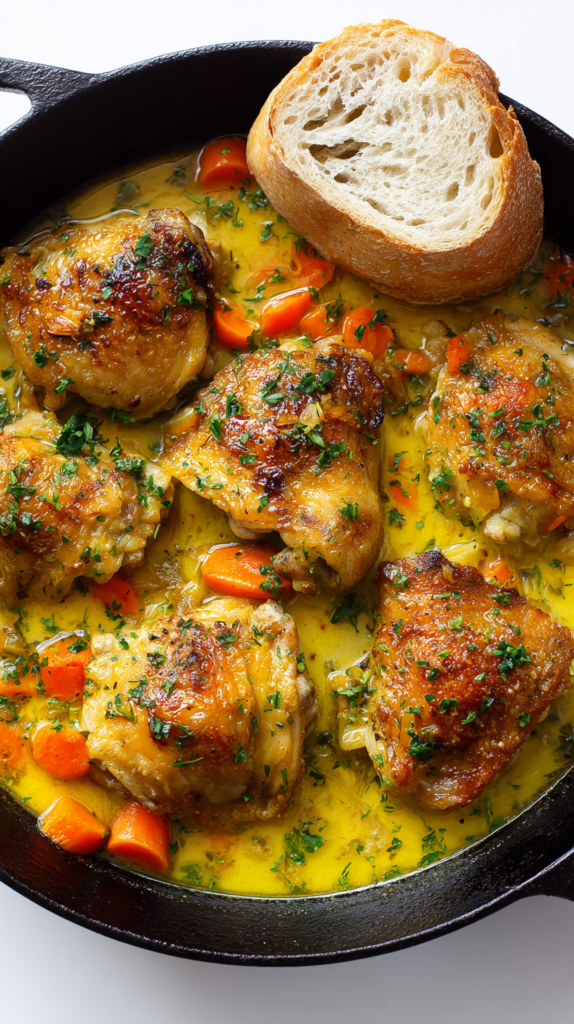
Bone-in, skin-on chicken thighs are one of the most forgiving proteins in the kitchen. They have enough fat and connective tissue to stay moist even if you cook them slightly past the target temperature. They cost less per pound than chicken breasts. They take seasoning more readily, develop better flavor through the Maillard browning process, and they are genuinely difficult to ruin if you understand a few basic principles about how heat and fat work together in a skillet.
This recipe gives you those principles in a format that produces consistent results from the first time you make it. Whether you are cooking skillet chicken thighs for a family weeknight dinner, a meal prep batch, or a dinner party, the technique here is the same — and once you have made it once, you will use it every time.
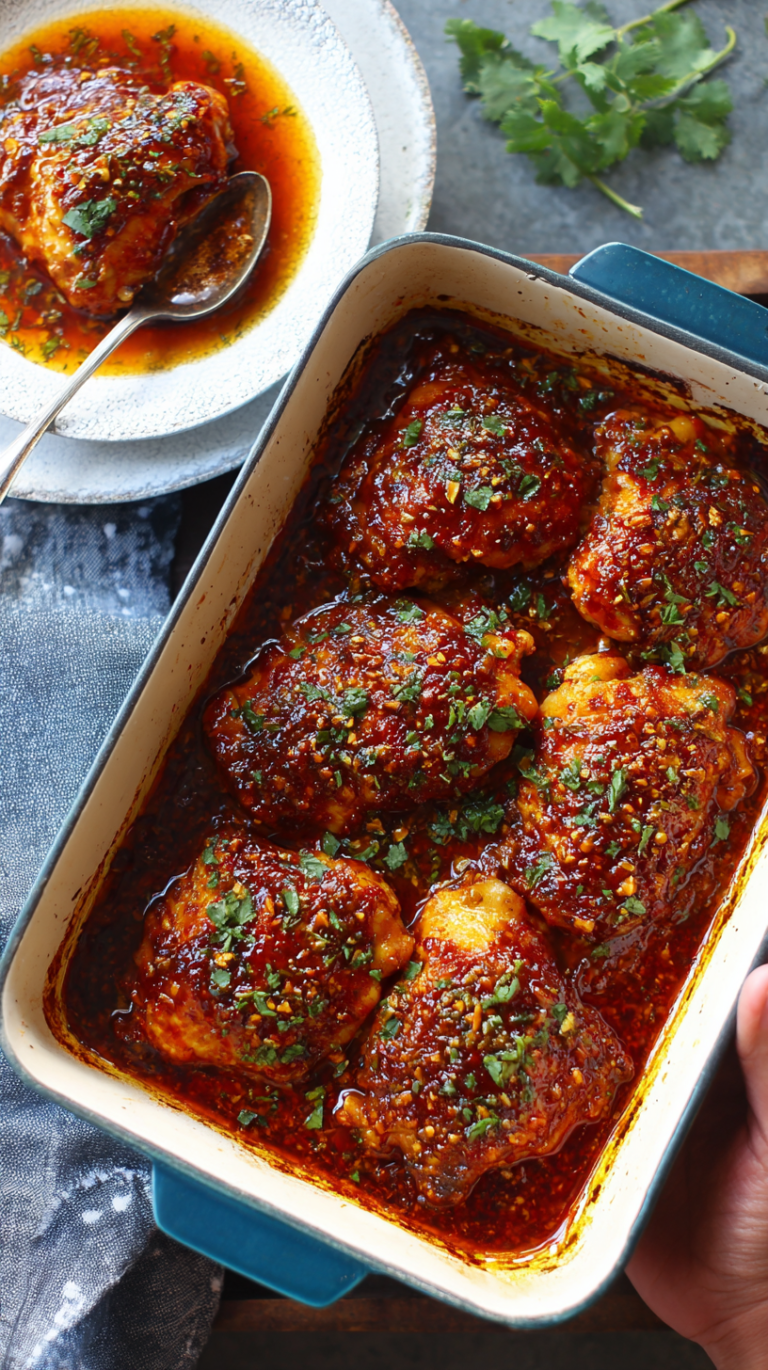
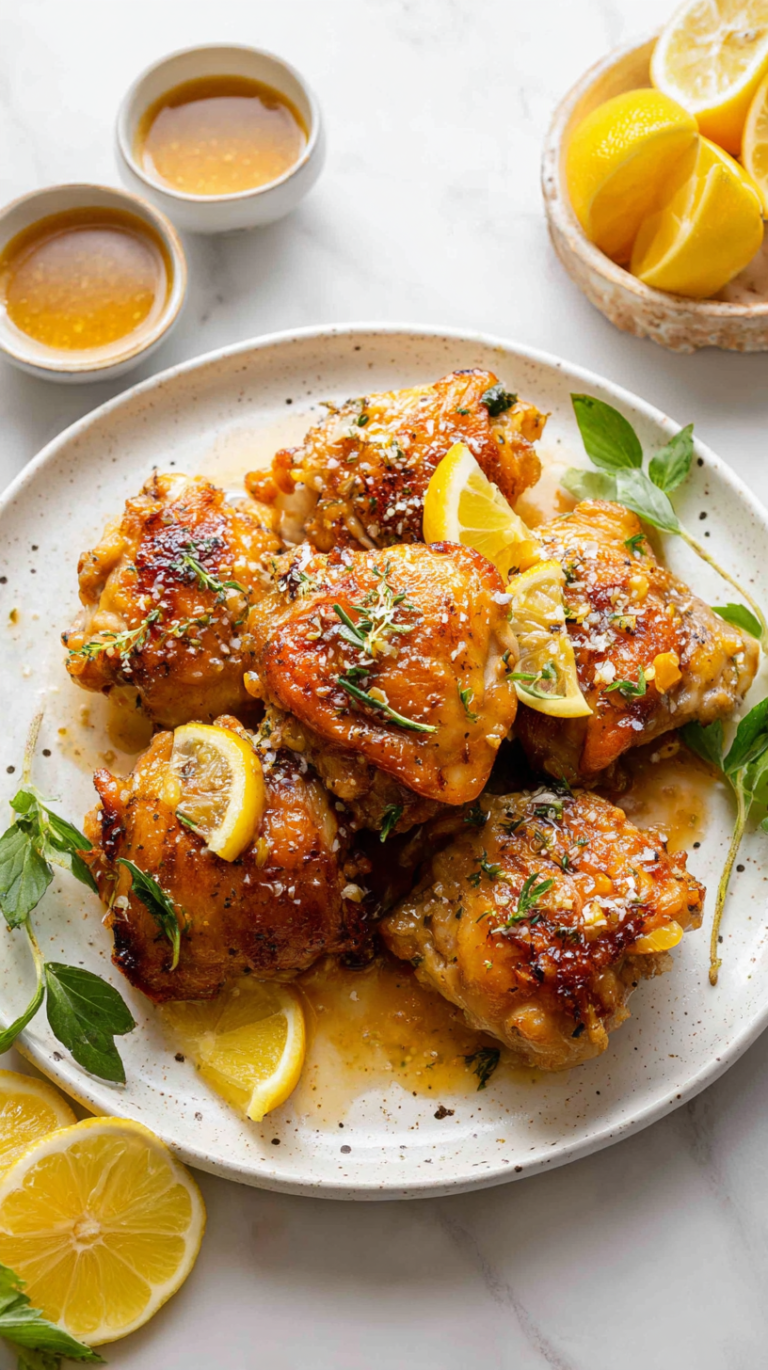
The six bone-in skin-on thighs in this recipe come out of the oven golden-brown, crackling, and smelling of paprika, garlic, and thyme. Every detail in the method below has a specific reason. None of them are difficult. Together they produce the best skillet chicken thighs most people will have made at home.
Why This Skillet Chicken Thighs Recipe Works
Skillet chicken thighs recipes fail most often at the skin. Understanding exactly why this method produces consistently crispy skin is what allows you to troubleshoot confidently and adapt the recipe to different cookware and stovetops.
Patting the Skin Completely Dry
The single most important step for crispy skin on skillet chicken thighs is removing all surface moisture before the chicken goes anywhere near a hot pan. Water on the surface of the skin has to evaporate before any browning can begin, which means wet chicken skin steams rather than crisps for the first several minutes in the pan. By the time the steam dissipates and browning begins, the skin has already softened and will not recover fully. Patting each thigh dry with paper towels takes 30 seconds and produces a visibly different skin texture from start to finish.
The Dry Spice Rub Applied to Dry Skin
Salt, garlic powder, onion powder, paprika, and thyme applied to dry skin adhere better and create a more cohesive seasoning crust than spices applied to wet or oily skin. Salt in particular begins drawing out trace moisture from the skin surface and then reabsorbing it within the first few minutes after application, which drives the seasoning slightly below the skin surface and improves flavor penetration. The brief resting period after seasoning and before cooking amplifies this effect.
Starting Skin-Side Down in a Cold Pan
Placing skillet chicken thighs skin-side down in a pan that is warm but not screaming-hot allows the fat under the skin to begin rendering slowly before the exterior starts browning. This is the professional technique that produces uniform, fully rendered skin without burning the surface before the fat beneath it has liquefied. A pan that is too hot when the chicken goes in will brown the outermost layer of skin quickly but leave a thick layer of unrendered fat underneath — the result is skin that looks golden but feels thick and fatty rather than thin and crispy.
Skin-Side-Down Without Moving
Leaving the skillet chicken thighs undisturbed skin-side-down for the majority of the stovetop portion of cooking is essential. Moving, lifting, or pressing the chicken during the sear disrupts the Maillard browning reaction that is actively building the crispy, caramelized skin crust. If the chicken is sticking slightly to the pan, that is a normal part of the searing process — it will release naturally when the skin is properly browned and the surface proteins have set. Forcing it up before it releases tears the skin.
The Oven Finish for Even Interior Cooking
Finishing bone-in skillet chicken thighs in a 400 F oven after the stovetop sear solves the most common structural problem of cooking thick bone-in meat entirely on the stovetop: the skin burns on the pan side before the meat near the bone reaches safe temperature. Transferring the skillet to the oven after achieving a deep golden-brown sear on the skin side allows the surrounding hot air of the oven to cook the chicken evenly from all sides simultaneously, without any additional browning on the already-seared skin.
Resting Before Serving
Resting skillet chicken thighs for 5 minutes after they come out of the oven allows the internal juices, which have been driven toward the center of the meat by the heat of cooking, to redistribute back through the muscle fibers. Cutting into chicken immediately after cooking releases these concentrated juices onto the cutting board rather than keeping them in the meat. A 5-minute rest produces noticeably juicier chicken with no additional cooking time required.
Ingredients for Skillet Chicken Thighs
This recipe makes 6 servings, one bone-in skin-on thigh per person. The ingredient list is intentionally minimal — the flavor comes from the seasoning technique and the browning process, not from a long list of components.
The Chicken
- 6 bone-in, skin-on chicken thighs, similar in size (approximately 5 to 7 oz each)
- 2 tablespoons olive oil
For more easy and delicious chicken recipes, explore our collection.
The Dry Spice Rub
- 1 teaspoon fine salt
- 1/2 teaspoon ground black pepper, freshly ground
- 1 teaspoon garlic powder
- 1 teaspoon onion powder
- 1 teaspoon paprika (smoked or sweet)
- 1 teaspoon dried thyme or Italian seasoning
Key Ingredient Notes
Bone-In, Skin-On Chicken Thighs: This recipe is specifically designed for bone-in, skin-on thighs. The bone conducts heat to the deepest part of the thigh and helps the meat cook evenly from the inside out. The skin is the primary texture element — it renders its fat during cooking and becomes the crispy, golden exterior that defines skillet chicken thighs done correctly. Boneless, skinless thighs can be used but they cook faster, do not produce the same crispy skin result, and require adjusted timing — see the Variations section. Select thighs that are as similar in size as possible so they finish cooking at the same time.
Olive Oil: Two tablespoons of olive oil in the skillet create the initial heat-transfer medium that begins the browning process on the skin. Olive oil has a smoke point of approximately 375 F to 405 F depending on quality — sufficient for stovetop chicken searing on medium to medium-high heat without burning. If your stovetop runs very hot or you prefer higher-smoke-point oil, avocado oil (520 F smoke point) is an excellent substitute. Do not use butter alone for the initial sear — butter contains milk solids that burn at temperatures below what you need for proper skin browning on skillet chicken thighs.
Salt: Fine salt rather than coarse kosher salt is recommended for a dry rub applied directly to skin. Fine salt dissolves more quickly into the surface moisture of the skin and integrates more evenly across the entire surface area of each thigh. If using Diamond Crystal kosher salt, increase the quantity to 1.5 teaspoons — Diamond Crystal is less dense than fine salt and requires more volume to deliver the same seasoning level.
Paprika: Smoked paprika adds a wood-smoke character that complements the Maillard browning of the skin and creates the impression of a slightly grilled quality even in a stovetop recipe. Sweet paprika produces a cleaner, mildly sweet pepper flavor. Both are excellent in skillet chicken thighs. Avoid hot paprika unless you specifically want a spicier dish — the quantity used here (1 teaspoon) would make the thighs noticeably spicy with hot paprika.
Garlic Powder and Onion Powder: Powdered aromatics in a dry rub on skillet chicken thighs provide consistent, even coverage that fresh garlic and onion cannot. Fresh garlic on the skin surface burns in the pan during the high-heat sear. Garlic powder and onion powder toast gently during the sear, developing a deeper, sweeter version of their raw flavor that integrates into the skin crust rather than sitting as a separate, potentially burned element on the surface.
Dried Thyme or Italian Seasoning: Dried thyme is the cleaner, more focused choice — it has an earthy, slightly floral herbal quality that pairs particularly well with dark meat chicken. Italian seasoning brings a broader herb blend of oregano, basil, marjoram, and rosemary that adds more complexity. Either produces excellent skillet chicken thighs. Use what suits your household’s preference and what you are serving the chicken alongside.
Required Equipment
The cookware choice for skillet chicken thighs matters significantly more than it does for most recipes. The wrong pan is the most common reason home cooks cannot replicate the crispy skin results they see in restaurant versions.
- 12-inch cast iron skillet or 12-inch stainless steel skillet — these are the two best options for skillet chicken thighs. Cast iron retains heat exceptionally well and distributes it evenly across the cooking surface, which produces uniform browning across the entire skin of each thigh. Stainless steel heats quickly, responds faster to temperature adjustments, and is oven-safe to higher temperatures than most non-stick pans. Both produce excellent results. A non-stick skillet is not recommended — the non-stick coating limits the maximum heat you can use, reduces browning, and cannot always go safely into a 400 F oven. Check your pan’s oven-safe temperature rating before proceeding.
- Oven-safe lid or foil — optional but useful if you want to ensure even finishing in the oven without the skin browning further after the stovetop sear
- Instant-read meat thermometer — essential for confirming skillet chicken thighs have reached the correct internal temperature. Bone-in thighs have complex geometry; the meat closest to the bone cooks slowest. A thermometer inserted parallel to the bone in the thickest section is the only reliable doneness indicator.
- Tongs — for placing the chicken thighs into the hot oil without splashing and for flipping them skin-side-up after the initial sear without tearing the skin
- Paper towels — for patting the thighs dry before seasoning; this step requires thorough coverage of the entire skin surface
- Wire rack set over a sheet pan — optional, for resting the cooked skillet chicken thighs after they come out of the oven if you want to keep the underside from steaming
Step-by-Step Instructions: How to Cook Skillet Chicken Thighs
Step 1: Dry and Season the Chicken Thighs
- Remove the chicken thighs from the refrigerator 20 to 30 minutes before cooking. Cold chicken placed directly into a hot pan drops the pan temperature significantly and extends the time needed to achieve a proper sear. Room-temperature chicken sears more evenly and faster.
- Place each chicken thigh on a clean cutting board or sheet pan. Using paper towels, press firmly against the skin surface of each thigh, pressing into the folds and creases of the skin where moisture tends to collect. Then pat the underside and bone side of each thigh. The skin should feel dry and slightly tacky to the touch when properly dried — not wet, not oily.
- In a small bowl, combine the salt, black pepper, garlic powder, onion powder, paprika, and dried thyme or Italian seasoning. Mix the spices together until evenly distributed.
- Sprinkle the spice rub evenly over both sides of each chicken thigh. Then press the seasoning into the skin firmly with your fingertips — this physical pressure ensures the spices make direct contact with the skin rather than sitting loosely on top where they can fall off when the thigh goes into the pan.
- Set the seasoned thighs aside for 10 to 15 minutes at room temperature. This brief rest allows the salt to begin its work on the skin surface.
Chef’s Note: If you have 45 minutes to 2 hours before cooking, season the thighs and leave them uncovered in the refrigerator on a wire rack set over a sheet pan. The refrigerator air further dries the skin surface and the extended salt contact deepens seasoning penetration. The difference in skin crispiness between a 15-minute room-temperature rest and a 2-hour refrigerator rest is meaningful and noticeable in the finished skillet chicken thighs.
Step 2: Preheat the Oven
- Set your oven to 400 F and allow it to fully preheat while you complete the stovetop searing steps. A fully preheated oven is essential — placing the skillet into a still-heating oven results in uneven cooking where the bottom of the skillet continues to receive direct heat while the top of the chicken receives only partial convection heat.
Step 3: Heat the Pan and Oil
- Place the 12-inch cast iron or stainless steel skillet on the stovetop over medium heat. Allow the pan to heat for 2 to 3 minutes before adding the oil. A properly preheated pan distributes heat more evenly and reduces the chance of hot spots that cause uneven browning on the skin of your skillet chicken thighs.
- Add the 2 tablespoons of olive oil to the heated pan. Tilt the pan to coat the bottom evenly. Heat the oil for an additional 60 to 90 seconds until it shimmers and moves freely around the pan when tilted. The oil is at the right temperature when a small drop of water flicked into the pan crackles and evaporates immediately.
Chef’s Note: The oil should shimmer but not smoke when you add the chicken. If the oil begins smoking before you add the thighs, reduce the heat slightly and wait 30 seconds. Skillet chicken thighs seared in smoking oil will have a bitter, acrid undertone in the finished skin rather than the clean, caramelized flavor that proper searing produces.
Step 4: Sear Skin-Side Down
- Using tongs, place the seasoned chicken thighs skin-side down in the hot oil one at a time. Place them away from you to minimize oil splashing. Leave space between each thigh — crowding the pan traps steam between the pieces and the skin will steam rather than sear. In a 12-inch pan, six thighs should fit without significant overlap, though they will be close together.
- Press each thigh gently but firmly with the tongs for 5 to 10 seconds immediately after it goes into the pan. This contact pressure ensures the skin makes full, even contact with the hot pan surface rather than curling away from the heat as the skin contracts from the temperature change.
- Once all six thighs are in the pan, reduce the heat slightly to medium if using cast iron, or maintain medium to medium-high if using stainless steel. The skin should be sizzling actively — a steady, vigorous crackle that you can hear from a few feet away. If the sizzling is faint or absent, increase the heat slightly.
- Sear the thighs skin-side-down without moving them for 8 to 10 minutes. Do not shift, press, or lift the thighs during this time. The skin will appear to stick to the pan initially — this is normal and expected. As the skin browns and the fat beneath it renders, the thighs will release from the pan surface naturally. Attempting to move them before they release will tear the skin.
- After 8 to 10 minutes, check the skin by gently nudging one thigh with the tongs. If it releases cleanly from the pan and lifts with minimal resistance, the sear is complete. The skin should be a deep golden brown — not pale yellow, not black, but a rich amber-brown that looks like it belongs on a restaurant plate. If the skin is still pale or sticking, continue searing for 1 to 2 more minutes.
Chef’s Note: You will notice significant fat rendering out of the skin and pooling in the pan during this sear. This is exactly what should happen. The rendering fat bastes the skin from below during the sear, contributing to the crispiness and flavor of the finished skillet chicken thighs. Do not drain this fat — it is an active and valuable part of the cooking process.
For more easy and delicious chicken recipes, explore our collection.
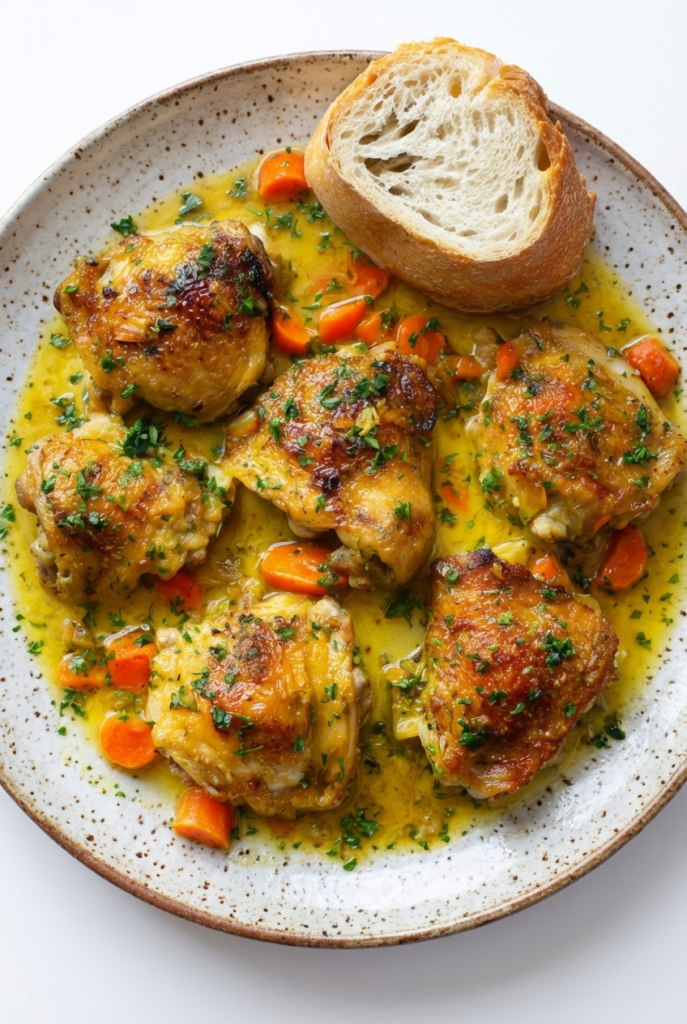
Step 5: Flip and Briefly Sear the Underside
- Using tongs, flip each chicken thigh from skin-side-down to bone-side-down in one smooth motion. The bone side will be pale at this point — that is expected. You are not trying to brown the underside the way you browned the skin; you are simply allowing the direct heat of the pan to begin cooking the meat from the bone side before the oven takes over.
- Sear the bone side for 2 to 3 minutes. You will see the pale meat on the edges of each thigh turn from translucent pink to opaque white as the heat penetrates the surface. This partial stovetop cook on the bone side reduces the total oven time needed and ensures the meat nearest the bone finishes cooking at the same time as the outer layers.
Step 6: Transfer to the Oven
- Transfer the entire skillet, with all six chicken thighs bone-side-down (skin-side-up), directly into the preheated 400 F oven. Place the skillet on the center rack.
- Roast uncovered for 18 to 22 minutes. The exact time will depend on the size of your thighs — larger thighs (7 oz each) will need closer to 22 minutes while smaller thighs (5 oz each) will be done in 18 minutes.
- At the 18-minute mark, begin checking the internal temperature with your instant-read thermometer. Insert the probe into the thickest part of the thigh, parallel to the bone, ensuring the tip is not touching the bone itself — bone conducts heat and will give a falsely elevated reading. The target for bone-in skillet chicken thighs is 175 F to 185 F for maximum tenderness. Unlike chicken breasts, bone-in dark meat benefits from cooking past the FDA-recommended 165 F minimum — the additional heat breaks down the collagen near the bone into gelatin, producing chicken that is far more tender and juicy than thighs pulled at exactly 165 F.
- When the thighs have reached 175 F to 185 F and the skin is a deep, uniform golden-brown across the entire surface, remove the skillet from the oven. The skin should look and sound crackling-crisp. If you tap the skin with your fingernail it should make a firm, hard sound rather than a soft, muted thud.
Step 7: Rest and Serve
- Transfer the skillet chicken thighs to a wire rack or resting plate. Do not cover them — covering traps steam and softens the crispy skin within minutes. Let the thighs rest uncovered for 5 minutes.
- After resting, the skin should have maintained its crispiness and the meat near the bone should no longer show any pink when you cut along the bone line with a sharp knife.
- Plate and serve immediately with your choice of sides, spooning any pan drippings over the chicken or saving them as a base for a pan sauce.
Chef Ramon Vega Pro Tips for Perfect Skillet Chicken Thighs
Tip 1: The Longer the Dry Rest, the Better the Skin
If you take nothing else from this recipe, take this: uncovered, salted skillet chicken thighs resting on a wire rack in the refrigerator for 2 to 4 hours before cooking will produce dramatically crispier skin than thighs seasoned 10 minutes before they go in the pan. The refrigerator air acts as a drying agent, pulling residual moisture from the skin surface, while the salt works its way into the meat. This is not a minor improvement. It is the same principle used in Peking duck preparation and it works equally well on skillet chicken thighs.
Tip 2: Start in a Warm Pan, Not a Cold or Screaming-Hot One
Medium heat for 2 to 3 minutes before adding oil, then oil for 60 to 90 seconds before adding chicken. This graduated approach ensures the pan surface is evenly heated before the chicken goes in. A cold pan causes the chicken to steam as it warms up. A screaming-hot pan browns the outermost skin layer before the fat beneath it has rendered, leaving a golden exterior over a thick, fatty, soft underlayer. The medium-heat warm-up produces skin that crisps from the inside out as the fat renders first and the exterior browns second.
Tip 3: Use a Splatter Screen if You Have One
Rendering fat from the skin of skillet chicken thighs splashes. A splatter screen placed over the pan during the stovetop sear reduces mess significantly without trapping steam the way a lid would. If you do not have a splatter screen, partially covering the pan with a lid tilted at an angle allows steam to escape while catching most of the fat splatter. Never fully cover the pan during the skin-side-down sear — the trapped steam will destroy the crispiness you are trying to build.
Tip 4: Do Not Drain the Pan Fat During Cooking
The rendered fat that accumulates in the pan as the skin of the skillet chicken thighs crisps is not a problem to be solved — it is a resource. That fat is flavored with paprika, garlic, thyme, and the natural rendered juices of the chicken. Use it to baste the top of the thighs just before they go into the oven by spooning a small amount over the bone side. Use the remainder after cooking as the base for a pan sauce, or spoon it over roasted vegetables or mashed potatoes at serving time.
Tip 5: Cook to 175 F to 185 F, Not 165 F
The USDA minimum safe temperature for chicken is 165 F, but bone-in skillet chicken thighs pulled at exactly 165 F will be technically safe but not at their best texture. Dark meat contains collagen that requires temperatures above 165 F to convert to gelatin. At 175 F to 185 F the collagen has broken down, the meat near the bone is fully tender and juicy, and the texture is fundamentally better than it is at 165 F. This is not a safety recommendation — 165 F is perfectly safe. It is a quality recommendation based on the specific composition of dark meat.
Tip 6: Never Cover During the Rest
Resting skillet chicken thighs under foil or a plate cover is the fastest way to destroy the crispy skin you spent 10 minutes building on the stovetop. Steam from the hot chicken immediately condenses on the foil or cover surface and drips back onto the skin, softening it within 2 to 3 minutes. Always rest skillet chicken thighs uncovered on a wire rack so air can circulate around the skin surface and the crispiness holds.
Tip 7: Deglaze the Pan for a Quick Pan Sauce
After removing the skillet chicken thighs from the pan to rest, the skillet contains deeply browned, concentrated drippings from the searing process — some of the most flavorful material in the entire recipe. Deglaze the hot pan with 1/4 cup of chicken broth, white wine, or a squeeze of lemon juice and a splash of water. Scrape the browned bits from the bottom of the pan as the liquid bubbles. Swirl in 1 tablespoon of cold butter and reduce for 2 minutes. The result is a simple but deeply savory pan sauce that takes 3 minutes and makes the finished skillet chicken thighs significantly more complete as a plate.
Tip 8: Match Thigh Sizes Before Cooking
Six bone-in skillet chicken thighs that vary from 4 oz to 8 oz in the same pan will not finish cooking at the same time. The small thighs will be at 185 F while the largest ones are still at 155 F. Sort through your package and, if necessary, trim the larger thighs slightly to bring them closer in weight to the smaller ones. Alternatively, pull smaller thighs as they reach temperature and hold them on a warm plate while the larger ones finish. Uniformity is the practical foundation of consistent results.
Common Mistakes to Avoid When Cooking Skillet Chicken Thighs
Mistake 1: Skipping the Dry-Pat Step
Wet chicken skin will not get crispy. It will steam in the pan, turning pale and soft rather than browning. This is the most consistently reported problem among people who attempt skillet chicken thighs and feel disappointed by the skin texture. Paper towels and 30 seconds of firm pressing against the skin surface is the most impactful single step in the entire recipe. Do not skip it.
Mistake 2: Moving the Chicken During the Sear
The urge to check, lift, press, or reposition the skillet chicken thighs during the stovetop sear is understandable, but it is the primary reason home cooks end up with torn skin or uneven browning. The Maillard reaction that produces the crispy, golden-brown crust requires sustained contact with the hot pan surface. Every time you lift the chicken, you interrupt the reaction. Leave the thighs completely undisturbed skin-side-down for the full 8 to 10 minutes. They will release when they are ready.
Mistake 3: Using a Non-Stick Pan
Non-stick pans have important limitations for skillet chicken thighs. Most non-stick coatings have a maximum safe temperature of 400 F to 450 F — the same range needed for proper searing. Using a non-stick pan for this recipe means either staying below proper searing temperature and getting pale, soft skin, or exceeding the coating’s safe temperature limit. Cast iron or stainless steel handles the heat requirements of this recipe without any safety or performance compromise.
Mistake 4: Cooking Entirely on the Stovetop
Attempting to cook bone-in skillet chicken thighs entirely on the stovetop without the oven finish requires either turning the heat very low for an extended time (which loses the crispy skin) or maintaining high heat until the thigh is done (which burns the skin before the bone-side meat is cooked through). The stovetop plus oven method is not a convenience choice — it is the structurally correct method for cooking thick bone-in chicken with crispy skin.
Mistake 5: Pulling at Exactly 165 F
As described in the Chef Tips section, pulling bone-in skillet chicken thighs at 165 F produces chicken that is safe but not at the ideal texture for dark meat. The connective tissue and collagen near the bone has not fully broken down at 165 F. Waiting until 175 F to 185 F produces a markedly different texture — genuinely fall-off-the-bone tender rather than tight and slightly rubbery near the joint. This is the single most counterintuitive technique point in the recipe and also one of the most impactful.
Mistake 6: Covering During the Rest
Covering the rested skillet chicken thighs with foil or a plate to keep them warm while other components finish cooking is a common instinct — and a direct path to soft, soggy skin. Keep the thighs on a wire rack, uncovered, in a warm spot or in a 200 F oven with the door cracked. The skin will hold its crispiness for up to 15 minutes in this environment.
Mistake 7: Seasoning Only the Skin Side
A spice rub applied only to the top of skillet chicken thighs leaves the bone side and the meat visible around the edges bland and underseasoned. Season both sides firmly, including pressing spices into the area around the joint where bone is exposed. Well-seasoned skillet chicken thighs taste complete in every bite regardless of which side you are eating.
Mistake 8: Crowding a Small Pan
Six bone-in thighs in a 10-inch or smaller pan means overlapping edges, steam trapped between pieces, and dramatically uneven browning. Use a 12-inch pan. If you only have a 10-inch pan, cook in two batches and hold the first batch in a 200 F oven while the second batch sears. Two properly seared batches of skillet chicken thighs are better than six improperly seared pieces cooked simultaneously in a pan that is too small.
Variations and Substitutions for Skillet Chicken Thighs
Boneless Skinless Skillet Chicken Thighs
Boneless, skinless chicken thighs can be cooked using the same spice rub and the same general stovetop method. Without skin, the visual and textural goal shifts from a crackling crust to a deep, caramelized sear on the meat surface itself. Sear boneless thighs for 4 to 5 minutes per side over medium-high heat until deep golden brown on each side. Check temperature — boneless thighs are done at 165 F and may be done in as little as 12 minutes total depending on thickness. No oven finish is typically required for boneless thighs, though a 3 to 4 minute oven rest at 350 F can help with even heat distribution in thicker pieces.
Lemon Herb Skillet Chicken Thighs
Add the zest of one lemon to the dry spice rub and finish the resting chicken thighs with a squeeze of fresh lemon juice immediately before serving. For additional herb brightness, toss 4 to 5 fresh thyme sprigs into the skillet during the final 2 minutes of the stovetop sear — the thyme will sizzle in the rendered fat and infuse the oil with a fresh herbal note that enhances the dried thyme in the spice rub. This variation is particularly effective in spring and summer when the bright citrus note complements lighter side dishes.
Garlic Butter Skillet Chicken Thighs
After flipping the chicken thighs to bone-side-down for the brief stovetop sear before the oven, add 3 tablespoons of unsalted butter and 4 whole smashed garlic cloves to the pan. As the butter melts, tilt the pan and use a large spoon to baste the skin side of the thighs with the garlic-infused butter. Repeat the basting every 30 seconds for the 2 to 3 minutes the thighs are on the stovetop before going into the oven. The butter basting produces a richly golden, deeply flavorful skin that is one of the most impressive versions of skillet chicken thighs.
For more easy and delicious chicken recipes, explore our collection.
Spicy Skillet Chicken Thighs
Add 1/2 teaspoon of cayenne pepper and 1 teaspoon of hot smoked paprika to the dry spice rub in place of standard paprika. For a Nashville hot-style variation, whisk together 2 tablespoons of cayenne, 1 tablespoon of brown sugar, 1 teaspoon of garlic powder, and 1/2 teaspoon of paprika into 3 tablespoons of the rendered pan fat after cooking. Brush this spiced oil over the cooked skillet chicken thighs immediately before serving. The result is a fiery, deeply flavored skin with a subtle sweetness from the brown sugar.
Mediterranean Skillet Chicken Thighs
Replace the thyme in the spice rub with 1 teaspoon of dried oregano and add 1/2 teaspoon of ground cumin and 1/4 teaspoon of cinnamon to the rub. After the stovetop sear and before transferring to the oven, scatter 1/2 cup of kalamata olives and 1/2 cup of cherry tomatoes around the thighs in the skillet. The tomatoes will burst and release their juices during the oven roast, creating a simple sauce in the pan that works beautifully as a serving liquid for the finished skillet chicken thighs.
Honey Mustard Glazed Skillet Chicken Thighs
Whisk together 2 tablespoons of Dijon mustard, 1 tablespoon of whole-grain mustard, 2 tablespoons of honey, 1 tablespoon of olive oil, and 1 teaspoon of apple cider vinegar. Apply the base spice rub as directed in the recipe, then brush this glaze over the bone side of the thighs just before they go into the oven. The glaze caramelizes during the oven roast, producing a sticky, glossy coating on the bone side with the original crispy seared skin on the top side. Do not brush the glaze on the skin before the oven — the sugar in the honey will burn on the already-hot skin surface.
Cast Iron Skillet Chicken Thighs With Vegetables
During the 2 to 3 minute bone-side stovetop sear, push the thighs to one side of the skillet and add 1 cup of halved baby potatoes, 1 cup of cherry tomatoes, and 1 cup of trimmed green beans to the empty pan space. Toss the vegetables in the rendered chicken fat. Season them with salt and pepper. Transfer the entire skillet to the oven with the thighs skin-side-up and the vegetables distributed around them. The vegetables will roast in the rendered chicken fat during the 18 to 22 minute oven finish, absorbing the seasoned fat and producing a complete one-pan skillet chicken thighs dinner.
Dairy-Free and Gluten-Free
This base skillet chicken thighs recipe is naturally both dairy-free and gluten-free as written. All six ingredients in the spice rub are inherently free of both. Verify your paprika and Italian seasoning brands are produced in facilities free of gluten cross-contamination if cooking for someone with celiac disease. The olive oil and chicken itself contain neither dairy nor gluten.
How to Store and Reheat Skillet Chicken Thighs
Refrigerator Storage
Allow the cooked skillet chicken thighs to cool to room temperature — approximately 20 minutes — before refrigerating. Store in an airtight container. The skin will soften during refrigeration, which is unavoidable due to the moisture environment of a covered container. Refrigerate for up to 4 days. Store the thighs in a single layer if possible rather than stacking them — stacked thighs press moisture from the meat against the skin of the thigh below.
Freezer Storage
Cooked skillet chicken thighs freeze well for up to 3 months. Cool completely, then wrap each thigh individually in plastic wrap and place the wrapped thighs in a zip-top freezer bag with as much air removed as possible. The individually wrapped portions make it easy to thaw only what you need. Thaw overnight in the refrigerator before reheating.
Reheating in the Oven
The oven is the best method for reheating skillet chicken thighs while recovering some of the original skin crispiness. Preheat to 400 F. Place the thighs skin-side-up on a wire rack over a sheet pan. Reheat uncovered for 15 to 18 minutes until the internal temperature reaches 165 F and the skin has tightened and re-crisped. This method will not fully replicate fresh-cooked skin, but it comes significantly closer than any other reheating approach.
Reheating in the Air Fryer
The air fryer is the fastest method for reheating skillet chicken thighs with reasonably crispy skin. Set to 375 F and reheat for 7 to 9 minutes, skin-side-up, checking at the 7-minute mark. The circulating hot air of the air fryer dehydrates the surface moisture that accumulated on the skin during refrigeration and restores a significant amount of crispiness. Check internal temperature before serving.
Reheating in the Microwave
Microwave reheating is acceptable when speed is the only consideration. The skin will be soft rather than crispy. Place the thigh in a microwave-safe dish, cover loosely with a damp paper towel to prevent the meat from drying out, and heat at 70 percent power in 90-second intervals until heated through. Confirm temperature before eating.
What to Serve With Skillet Chicken Thighs
Skillet chicken thighs pair with an exceptionally wide range of sides. Their savory, deeply browned flavor is compatible with both robust hearty sides and light, vegetable-forward accompaniments.
Starches
- Mashed potatoes — the classic pairing; the pan drippings from the skillet chicken thighs serve as an instant gravy
- Roasted garlic mashed potatoes with butter and cream
- White or brown rice — a clean, neutral base that absorbs the pan drippings beautifully when spooned over
- Creamy polenta with Parmesan — one of the most satisfying pairings for skillet chicken thighs with a pan sauce
- Crispy roasted potatoes — double the crunch element on the plate
- Egg noodles with butter and fresh parsley
- Crusty sourdough bread — for capturing every drop of pan drippings
Vegetables
- Roasted broccoli with garlic and lemon — the slight bitterness cuts through the richness of the chicken fat
- Sauteed green beans with garlic and toasted almonds
- Roasted asparagus with lemon zest and shaved Parmesan
- Braised kale or collard greens with garlic and chili flakes
- Roasted carrots with honey and thyme — the sweetness complements the paprika and thyme in the skillet chicken thigh spice rub
- Corn on the cob or creamed corn
Salads
- Simple arugula salad with lemon vinaigrette — the peppery bitterness of arugula provides contrast to the rich, fatty chicken thigh
- Greek salad with cucumber, tomato, red onion, olives, and feta
- Caesar salad with house-made dressing
- Watermelon and feta with mint — a particularly effective summer pairing with the paprika-seasoned skillet chicken thighs
Pan Sauce Suggestion
After removing the finished skillet chicken thighs from the pan, place the skillet over medium-high heat. Add 2 finely sliced shallots and cook in the rendered fat for 2 minutes until softened. Deglaze with 1/2 cup of dry white wine and scrape all the browned bits from the pan bottom. Add 1/2 cup of chicken broth and reduce by half over 3 to 4 minutes. Remove from heat and whisk in 2 tablespoons of cold butter and 1 teaspoon of Dijon mustard until smooth. Season with salt and pepper. Spoon over the plated skillet chicken thighs. This takes 8 minutes and transforms a simple weeknight dinner into something genuinely impressive.
Nutrition Estimate Per Serving
Based on 6 servings of one bone-in, skin-on skillet chicken thigh each, cooked with the oil and spice rub as written. Values are estimates and will vary based on the size of the thighs and specific oil absorption during cooking.
| Nutrient | Amount Per Serving (1 bone-in chicken thigh) |
| Calories | 320 kcal |
| Total Fat | 22g |
| Saturated Fat | 6g |
| Cholesterol | 130mg |
| Sodium | 480mg |
| Total Carbohydrates | 2g |
| Dietary Fiber | 0g |
| Total Sugars | 0g |
| Protein | 29g |
| Potassium | 320mg |
| Iron | 2mg |
Note: Removing the skin before eating reduces total fat to approximately 10g and calories to approximately 205 kcal per serving with the same protein content. The garlic butter variation adds approximately 60 to 80 calories per serving depending on the amount of butter absorbed.
Frequently Asked Questions About Skillet Chicken Thighs
How long do skillet chicken thighs take to cook?
Skillet chicken thighs using this stovetop-plus-oven method take approximately 30 to 35 minutes of total cooking time: 10 to 12 minutes on the stovetop for the skin sear, 2 to 3 minutes for the brief bone-side sear, and 18 to 22 minutes in a 400 F oven to finish. Smaller thighs (5 oz each) will be done in approximately 28 to 30 minutes. Larger thighs (7 to 8 oz each) will need closer to 35 minutes. Always confirm doneness with an instant-read thermometer rather than relying on timing alone.
What temperature should skillet chicken thighs reach?
The FDA minimum safe internal temperature for chicken is 165 F. For bone-in skillet chicken thighs, cooking to 175 F to 185 F produces significantly better texture — the connective tissue near the bone breaks down into gelatin at these temperatures, producing meat that is fall-off-the-bone tender rather than tight and slightly chewy. Dark meat does not dry out at 175 F to 185 F the way white meat would. For food safety the minimum is 165 F; for optimal quality in bone-in dark meat, 175 F to 185 F is the professional target.
Why is the skin on my skillet chicken thighs not crispy?
The three most common causes of soft, pale skin on skillet chicken thighs are: not patting the skin dry before cooking, cooking in a pan that is not hot enough to sear rather than steam, and covering the pan during cooking which traps steam. Address all three in sequence: pat completely dry, use a well-preheated cast iron or stainless skillet at medium heat, and never cover during the stovetop sear. Also ensure you are not moving the chicken during the skin-down sear — frequent movement prevents the sustained contact needed for the Maillard browning reaction that creates crispy skin.
Can I make skillet chicken thighs without an oven?
Yes, but it requires more attention. After achieving the skin-side sear, flip the thighs bone-side-down, reduce the heat to medium-low, and cover the pan with a tight-fitting lid. Cook for 20 to 25 minutes until the internal temperature reaches 165 F. Remove the lid for the final 3 to 5 minutes to allow the skin to firm up slightly from the residual heat. The skin will not be as crispy as the oven-finished version but the chicken will be fully cooked and flavorful. Check the temperature of the largest thigh at the 20-minute mark and adjust time accordingly.
Should skillet chicken thighs be covered when cooking?
No, not during the stovetop sear phase. Covering the pan traps steam from the rendering fat and hot meat, which is precisely what makes skin soft rather than crispy. During the oven phase, the skillet is transferred uncovered. The only situation where covering is appropriate for skillet chicken thighs is if you are finishing them on the stovetop without an oven and need to cook the interior through — in that case, a lid after the skin sear, with the heat reduced, allows the interior to cook through without burning the exterior.
Can I use skinless chicken thighs for this recipe?
Yes. Boneless, skinless chicken thighs cooked in a skillet use the same spice rub and a similar searing technique. Without skin, you sear the smooth surface of the thigh directly, aiming for a deep golden-brown caramelized crust on both sides. Cook 4 to 5 minutes per side over medium-high heat until the internal temperature reaches 165 F. No oven finish is required. The texture goal is different from bone-in skin-on skillet chicken thighs — you are building a seared crust on the meat itself rather than rendering a layer of skin fat — but the flavor profile from the spice rub is identical.
What is the best pan for skillet chicken thighs?
A 12-inch cast iron skillet is the best pan for skillet chicken thighs. It retains heat exceptionally well, distributes it evenly across the cooking surface, and is oven-safe to temperatures well beyond what this recipe requires. Cast iron also develops a non-stick seasoning over time that improves with each use. A 12-inch stainless steel skillet is an excellent second choice — it heats quickly, handles high heat without issue, and is fully oven-safe. Avoid non-stick pans for this recipe — the coating limits maximum temperature and reduces the quality of the sear.
How do I stop skillet chicken thighs from sticking to the pan?
Skillet chicken thighs sticking to the pan during the skin sear is normal and does not indicate a problem. The skin is actively adhering to the hot metal surface as the proteins on the outer layer of the skin cook and bond with the pan. This is part of the searing process. The thigh will release naturally and cleanly from the pan once the skin has fully browned and the surface proteins have set — typically after 8 to 10 minutes undisturbed. If you try to force the chicken off the pan before it releases on its own, the skin will tear. Wait for the natural release.
Final Thoughts on Skillet Chicken Thighs
Skillet chicken thighs are one of the most reliably satisfying weeknight dinners in the home cook’s repertoire, and the technique in this recipe is what makes them consistently exceptional rather than occasionally good. Pat the skin dry. Season both sides. Use a properly heated cast iron or stainless skillet. Do not move the chicken during the sear. Finish in a 400 F oven. Cook to 175 F to 185 F for dark meat. Rest uncovered.
None of these steps are complicated. Each one has a specific mechanical reason that produces a specific result. Learn the reasons, not just the steps, and you will be able to cook perfect skillet chicken thighs in any kitchen with any stovetop and any of the variations described in this recipe.
Dark meat is the forgiving, flavorful, underappreciated cut of chicken, and the skillet is the best tool for developing everything that makes it exceptional. The Maillard browning on the skin surface, the rendered fat that bastes the meat from below during the sear, the gentle finishing heat of the oven, the collagen breakdown that happens between 165 F and 185 F — all of it comes together in a piece of chicken that tastes and looks far better than its short ingredient list would suggest.
Make this recipe with the base spice rub first. Then work through the variations. Add the pan sauce. Build your own combination. Skillet chicken thighs are one of those recipes that rewards investment with completely disproportionate results.
Follow me on Pinterest for more delicious recipes.