No-Bake Oreo Cheesecake (Easy, Creamy & No Oven Needed!)
If you are looking for a no-bake Oreo cheesecake that is rich, creamy, loaded with cookies, and holds its shape perfectly when sliced, this is the only recipe you will ever need. No water bath, no springform pan stress, no gelatin — just a thick Oreo cookie crust, a luscious cream cheese filling, and enough crushed Oreos to make every single bite count.
For more easy and delicious Dessert, explore our collection.
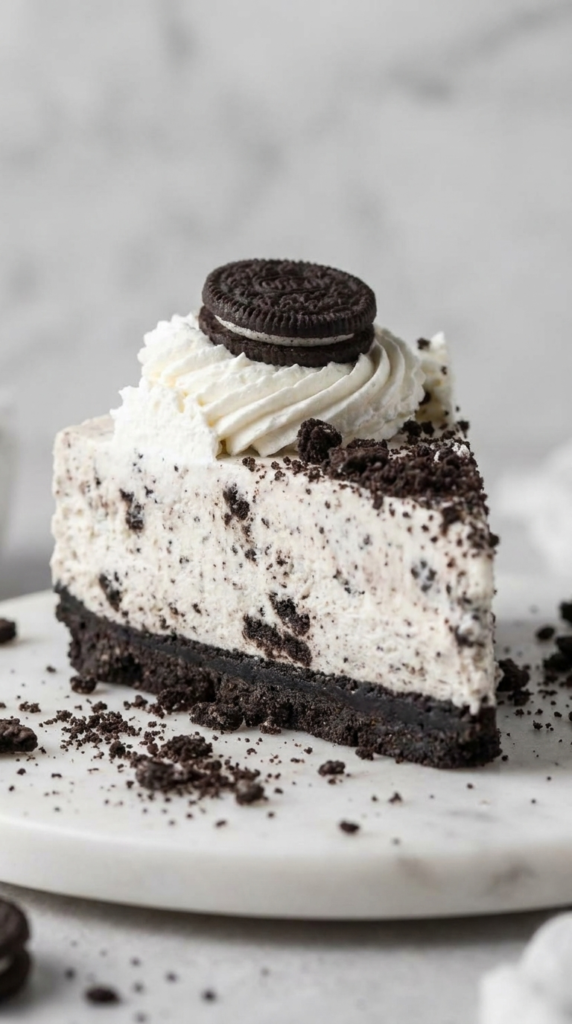
This easy no-bake Oreo cheesecake is perfect for summer entertaining, birthday parties, holidays, or any time you want a showstopper dessert without turning on the oven. It chills overnight in the fridge and comes out firm, sliceable, and absolutely gorgeous every time.
Why This No-Bake Oreo Cheesecake Works
The secret is the combination of brick-style cream cheese and cold heavy whipping cream. The cream cheese gives the filling body and that signature tangy richness. The whipped cream — beaten to stiff peaks before folding in — is what makes the texture light yet firm enough to hold clean slices.
Most no-bake cheesecake failures come from one of two problems: cream cheese that was not fully softened, or heavy cream that was not cold enough to whip properly. Follow the tips below and neither will be an issue.
Ingredients
For the Oreo crust:
- 24 Oreos (whole, filling included)
- 4 tablespoons unsalted butter, melted (60 grams)
For the no-bake cheesecake filling:
- 16 ounces brick-style cream cheese, fully softened to room temperature
- 1 cup powdered sugar (120 grams)
- 1 teaspoon pure vanilla extract
- 2 cups cold heavy whipping cream (480 ml)
- 16 Oreos, roughly chopped into chunky pieces
For the topping (optional but highly recommended):
- Homemade whipped cream
- 12 to 14 mini Oreos, chopped — or 6 full-size Oreos cut in half
Learn more about cheesecake and its many variations on Wikipedia — one of the most beloved desserts across cultures worldwide.
Equipment You Need
- 9-inch springform pan
- Stand mixer or hand electric mixer
- Food processor or zip-lock bag and rolling pin for crushing Oreos
- Rubber spatula
- Plastic wrap
For more easy and delicious Dessert, explore our collection.
Step-by-Step Instructions
Step 1 — Make the Oreo crust
Place 24 whole Oreos into a food processor and pulse until you get fine, uniform crumbs with no large chunks. Pour in the melted butter and pulse again until the mixture looks like wet sand and holds together when pressed between your fingers. Press the mixture firmly and evenly into the bottom of your 9-inch springform pan. Use the flat bottom of a glass or measuring cup to pack it down tight — this prevents a crumbly crust that falls apart when sliced. Refrigerate while you make the filling.
Step 2 — Beat the cream cheese base
In a large bowl, beat the softened cream cheese with your electric mixer on medium-high speed for about 2 minutes until it is completely smooth with zero lumps. Scrape down the sides of the bowl. Add the powdered sugar and vanilla extract. Beat again until fully combined, smooth, and creamy. Set aside.
Step 3 — Whip the heavy cream
In a separate clean, cold bowl, beat the cold heavy whipping cream on high speed until stiff peaks form. This takes about 3 to 4 minutes. The cream should hold its shape firmly when you lift the beaters.
Step 4 — Fold together
Gently fold the whipped cream into the cream cheese mixture in three additions, using a rubber spatula with slow, deliberate strokes from the bottom up. You want to keep as much air in the filling as possible. Once combined and no streaks remain, fold in the 16 chopped Oreos.
Step 5 — Fill and chill
Spoon the filling over the chilled Oreo crust. Smooth the top with your spatula into an even layer. Cover the pan tightly with plastic wrap and refrigerate for a minimum of 6 hours — overnight is strongly preferred and gives the cleanest slices.
Step 6 — Top and serve
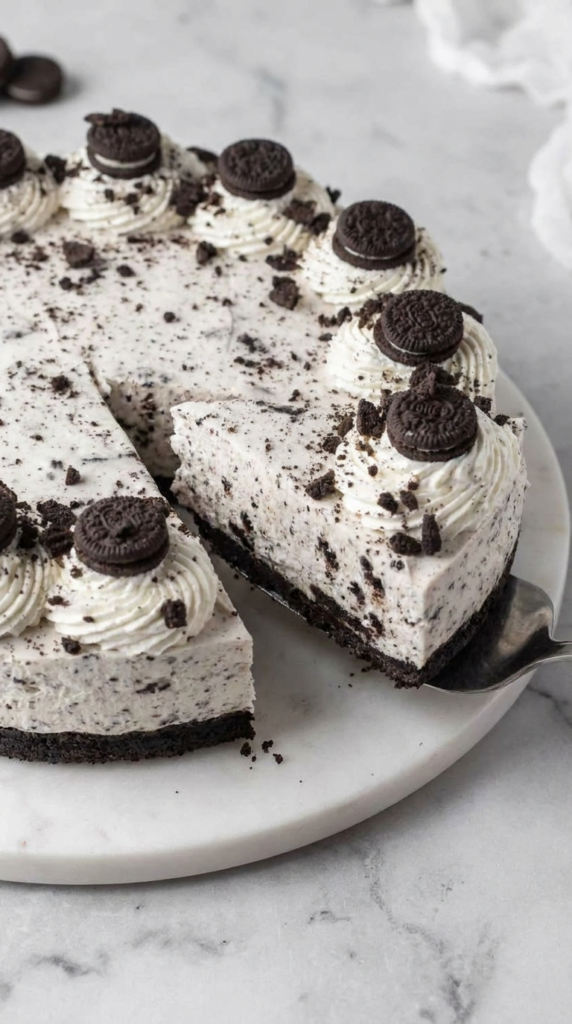
Right before serving, pipe or dollop homemade whipped cream around the edges. Scatter the chopped mini Oreos over the top. Run a thin knife around the edge of the pan before releasing the springform collar. Slice with a sharp, clean knife wiped between cuts.
Chef Dana’s Pro Tips
- Room temperature cream cheese is non-negotiable. Cold cream cheese will leave lumps in your filling that no amount of mixing will smooth out. Set it out at least 1 hour before you start.
- Keep your bowl and beaters cold for the whipped cream. Pop them in the freezer for 10 minutes before whipping. Cold equipment means faster, stiffer peaks.
- Do not over-fold the whipped cream. Fold gently and stop the moment the mixture is uniform. Over-mixing deflates the air and gives you a dense filling instead of a light mousse-like texture.
- Press that crust firmly. A loosely packed crust crumbles when you try to cut and lift a slice. Press hard, especially around the edges where it meets the pan wall.
- Chop the Oreos coarsely, not finely. You want visible chunks of cookie throughout the filling for texture contrast. Fine crumbs disappear into the filling and lose their impact.
- For the cleanest slices, dip your knife in hot water and wipe it dry between each cut. This glides through the chilled cheesecake without dragging.
Common Mistakes to Avoid
- Using spreadable cream cheese. Always use brick-style. The tub version has a higher water content and will make your cheesecake too soft to hold its shape.
- Skipping the overnight chill. Six hours is the bare minimum. Overnight gives the filling time to fully set and develop its flavor.
- Adding Oreos to the filling too early. If you fold in the chopped Oreos while the cream cheese mixture is still warm from mixing, the cookies will start to dissolve and turn grey. Let the filling cool slightly before folding.
- Not covering the pan. An uncovered cheesecake in the fridge picks up other odors and can develop a dry cracked surface. Always wrap tightly.
Variations & Substitutions
Double Stuf Oreos work great in both the crust and the filling — they add extra sweetness and a softer more buttery crust texture.
Golden Oreos swap in perfectly if you want a vanilla cheesecake version with a lighter-colored crust.
For a chocolate twist, add 2 tablespoons of unsweetened cocoa powder to the cream cheese mixture along with the powdered sugar.
For a lighter version, replace half the heavy cream with cold whipping cream at 30% fat instead of 36% — the texture will be slightly softer but still delicious.
No springform pan? Use a 9×13 baking dish and serve it as cheesecake bars instead of sliced wedges. Press the crust into the bottom, fill, chill, and cut into squares.
For more dessert inspiration, visit the Recipes by Elowen Pinterest board — filled with no-bake desserts, cheesecake ideas, and easy party recipes.
Storage & Make-Ahead
Refrigerator: Cover the cheesecake and store in the fridge for up to 5 days. The Oreo pieces will soften slightly over time but the flavor only deepens.
Freezer: This cheesecake freezes beautifully. Wrap individual slices in plastic wrap, then foil, and freeze for up to 2 months. Thaw overnight in the refrigerator before serving. Add the whipped cream and fresh Oreo topping after thawing, not before freezing.
Make-ahead tip: Assemble everything except the whipped cream topping, refrigerate overnight, and add the toppings right before guests arrive.
Serving Suggestions
This no-bake Oreo cheesecake pairs beautifully with a scoop of vanilla bean ice cream on the side. A drizzle of hot fudge or chocolate sauce over each slice takes it over the top for a chocolate lover’s dream dessert. Serve it alongside fresh strawberries or raspberries if you want a fruit element that cuts through the richness.
Nutrition Estimate (Per Slice, Based on 12 Slices)
Calories: 480 kcal — Fat: 34g — Saturated Fat: 19g — Carbohydrates: 40g — Sugar: 28g — Protein: 5g — Fiber: 1g — Sodium: 310mg — Cholesterol: 95mg
For more on the nutritional composition of cream cheese, Wikipedia provides a solid breakdown of this key ingredient.
FAQ
— Do I need gelatin to make this no-bake cheesecake set? No. The combination of brick-style cream cheese and properly whipped heavy cream provides enough structure without any gelatin, provided the cheesecake is chilled for at least 6 hours and ideally overnight.
— Can I use an 8-inch pan instead of 9-inch? Yes. The filling will be taller and slightly denser. Increase the chill time to at least 8 hours since the thicker filling takes longer to fully set.
— Why is my no-bake cheesecake not setting? Most likely the heavy cream was not whipped to stiff peaks, or the cream cheese was too warm when mixed. Make sure both are at the right temperature before starting. If the cheesecake is still soft after 6 hours, give it another 4 hours — it often just needs more time.
— Can I use low-fat cream cheese? Technically yes, but the result will be noticeably softer and less rich. Full-fat brick-style cream cheese is strongly recommended for the best texture and flavor.
— Can I make mini no-bake Oreo cheesecakes? Absolutely. Press the crust into the bottom of lined muffin tins, fill with the cheesecake mixture, and refrigerate. Mini cheesecakes set faster — usually 3 to 4 hours is enough.
— How do I get clean slices? Run your knife under hot water, wipe it dry, and cut in one smooth downward motion without sawing. Wipe the blade clean between every single cut.
— Can I add a chocolate ganache topping? Yes and it is incredible. Melt half a cup of heavy cream with 4 oz of chopped dark chocolate, let it cool to room temperature, then pour it over the chilled cheesecake before adding the Oreo topping.
— How far in advance can I make this? Up to 2 days in advance in the refrigerator without the whipped cream topping, or up to 2 months in the freezer. It is one of the best make-ahead desserts for parties and holidays.
Conclusion
This no-bake Oreo cheesecake is everything a great dessert should be — impressive to look at, straightforward to make, and completely irresistible to eat. Once you nail the technique of properly whipped cream folded into smooth cream cheese, you will use this formula for every flavor variation imaginable.
Make it the night before, keep it cold, add your toppings right before serving, and watch it disappear in minutes.
Save it to your board on Pinterest — Recipes by Elowen so it is always one tap away when you need a crowd-pleasing no-bake dessert.
Print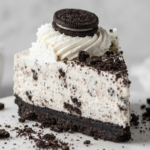
No-Bake Oreo Cheesecake (Easy, Creamy & No Oven Needed!)
- Prep Time: 20
- Cook Time: 0 minutes
- Total Time: 6H 20min
- Yield: 12
- Category: Dessert
- Method: NO bake
- Cuisine: American
Description
Rich, creamy, and loaded with crushed Oreos in every bite. No oven, no gelatin — just a buttery Oreo crust, a light cream cheese filling, and a whipped cream topping. The perfect make-ahead dessert for any occasion.
Ingredients
For the Oreo Crust:
- 24 Oreos, whole
- 4 tablespoons unsalted butter, melted (60g)
For the Filling:
- 16 ounces brick-style cream cheese, fully softened
- 1 cup powdered sugar (120g)
- 1 teaspoon pure vanilla extract
- 2 cups cold heavy whipping cream (480ml)
- 16 Oreos, roughly chopped
For the Topping:
- Homemade whipped cream
- 12 to 14 mini Oreos, chopped
Instructions
- Pulse 24 Oreos to fine crumbs. Add melted butter and pulse until combined. Press firmly into a 9-inch springform pan. Refrigerate.
- Beat softened cream cheese until completely smooth. Add powdered sugar and vanilla. Beat until creamy.
- In a cold bowl, beat cold heavy cream to stiff peaks.
- Fold whipped cream into cream cheese mixture in three additions. Fold in chopped Oreos last.
- Pour filling over crust. Smooth top. Cover and refrigerate at least 6 hours or overnight.
- Top with whipped cream and chopped Oreos before serving. Slice with a hot clean knife.
Notes
- Use brick-style cream cheese only — never spreadable tub cream cheese.
- Overnight chilling gives the best texture and cleanest slices.
- Dip knife in hot water and wipe dry between each slice for clean cuts.
- Freezes well up to 2 months. Add toppings only after thawing.
Follow me on Pinterest for more delicious recipes.